 Welcome to the second of my detailed write-ups of the London Coffee Festival. If you want to know what I made of the festival as a whole, take a look at my round-up. Here I’ll be covering individual aspects of the festival. I started with all the interesting coffee kit that I came across at the festival, while today I’ll be looking my coffee experiences, with another Saturday Supplement dedicated to the La Cimbali sensory sessions. The remaining Saturday Supplements explore themes such as cups and the coffee itself.
So, what do I mean by coffee experiences? This is a new category for this year and so deserves a little bit of explanation. By coffee experiences, I mean the things that go around the coffee itself, in this case, coffee cupping (and variations thereon from Assembly and Union Hand-roasted), a coffee roasting demonstration (Union again) and some latte art lessons, courtesy of The Roasting Party).
We’ll round things off with an interesting feature: man vs machine, where the Steampunk, from Alpha Dominche, went head-to-head with a human to see who could make the best coffee (and, in one case, tea!).
Let’s get things going with a coffee cupping, which is first up after the gallery.


 colleague.")


 but no-one bettered Josh's 24 seconds!")
 1
1 2
2 3
3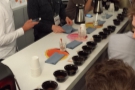 4
4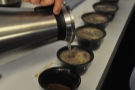 5
5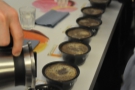 6
6 7
7 8
8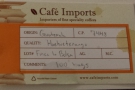 9
9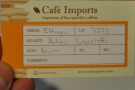 10
10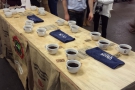 11
11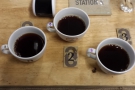 12
12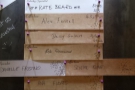 13
13 14
14 15
15So, first up, on my first day, was a cupping with Assembly Coffee. Assembly is a new venture, a collaboration between the roaster Volcano Coffee Works and various leading figures in the coffee industry. I was invited along by Michael, who I knew from his time with Dunne Frankowski at Sharps. For more information about Assembly’s innovative and collaborative approaches to coffee, check out the Assembly website which explains it far better than I ever will!
For a quick run-down on what an actual cupping is, check out my post on the Small Batch cupping I attended at Finisterre. The idea is to taste the coffee with as little distraction as possible. As regular readers will know, the preparation method has a huge impact on how coffee tastes, so a cupping is designed to get as close as possible to the pure coffee taste.
In all we cupped ten coffees, and while I could tell the difference between each one, I still couldn’t tell you, blind tasting, which came from where. However, my palette is definitely evolving; there was one Kenyan that tasted so like a Kenyan that I thought “that’s a Kenyan”. I didn’t like it by the way. There was also a washed Yirgacheffe from Ethiopia that was so tea-like that I had to spit it out immediately! On the plus side, there was a Kenyan that I actually liked and a couple that, for me, were clear stand-outs: a Guatemalan Huehuetenango and a naturally processed Ethiopian Yirgacheffe.
If you are at all interested in how coffee tastes and how that taste varies by region or processing method, I’d recommend that you attend a cupping. Even if you have a relatively undiscerning palette like me, you’ll get a lot out of it.
However, I’m still not very good at this whole cupping lark, as I amply demonstrated the following day when I took the Union Hand-roasted challenge. Union had laid out three different coffees, one each from Ethiopia, Panama and Brazil. For each one, there were three bowls, two with the same coffee, but one of which was different. The idea was to go along the line and pick out the different one from each set.
It sounds simple, but it’s not. I had no clue and ended up pretty much guessing each time. Unsurprisingly, I got one out of three right in a distinctly unimpressive 2 minutes, 43 seconds. To give you an idea of how bad that is, my friend Kate got them all correct in 37 seconds and the eventual winner did it in 24 seconds, which is mind-bogglingly quick! I’ve been told that there are people who can tell the odd one out simply by smell. Clearly I’m in a different league…
In my defence though, this wasn’t easy. The differences were very, very subtle. For example, one of the odd ones out was the grown on a different farm from the other two. Personally I think that’s really mean for the sensorial-challenged such as myself.
Next up, after the gallery, a coffee roasting demonstration.


 1
1 2
2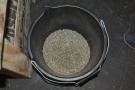 3
3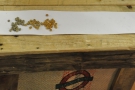 4
4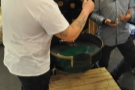 5
5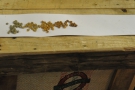 6
6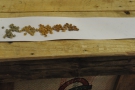 7
7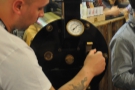 8
8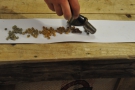 9
9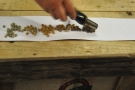 10
10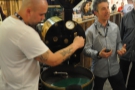 11
11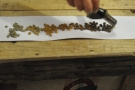 12
12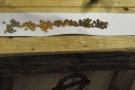 13
13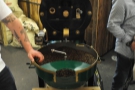 14
14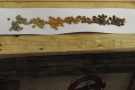 15
15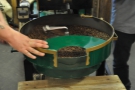 16
16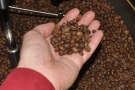 17
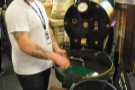
17As part of my Meet the Roaster series I’ve been to quite a few roasters and seen more than my fair share of beans being roasted, learning quite a bit along the way. Even so, I was keen to see Union roasting demonstration, finally catching the last one on the last day! The talk was given by Steve, from Union, while his colleague James did the actual roasting on a 3kg San Francisco roaster.
Every roaster has a built-in sample scoop, which allows you to extract a sample of the beans while roasting. This enables you to check on their progress, or, in James’ case, to show us, the audience, the progression of beans from green through various shades of brown to the final roasted shade. At regular intervals, he extracted some beans and laid them out in a line on the table in front of the roaster (take a look at the gallery if you haven’t already).
One of the key skills of the roaster is knowing when the coffee is done. Steve used the analogy of scrambled egg; for the perfect scrambled egg you need to take it off the heat just before it’s done, since it will always cook a little bit longer in the pan. The same is true of the coffee; no matter how quickly you cool it in the pan, there will always be a little bit of extra roasting going on after you’ve emptied the roaster.
So, the trick is to catch the beans just before they are ready. Leave them in until they’re done and you’re probably going to ruin the batch. While this might be just about acceptable on a 3kg roaster, imagine what would happen if you did that one of Union’s 70kg production roasters…
I found Steve’s talk really informative. My only issue with it was out of his control: the music from the True Artisan Café across the way was so loud that it was often hard to make out what he was saying.
After the gallery you can see how I got on when I had some latte art lessons.


 1
1 2
2 3
3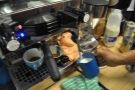 4
4 5
5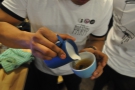 6
6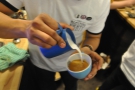 7
7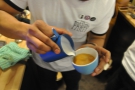 8
8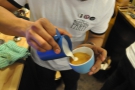 9
9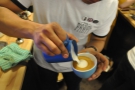 10
10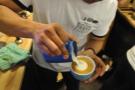 11
11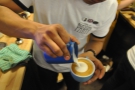 12
12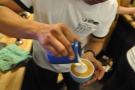 13
13 14
14 15
15 16
16 17
17 18
18 19
19 20
20 21
21My friends at The Roasting Party arranged for me to have a 20 minute latte art class with Dhan Tamang, from Winchester, UK latte art champion. No pressure then! Having recently been on a barista training course with the Department of Coffee and Social Affairs, I’d got some of the basics and I was keen to build on that with Dhan.
It all starts with the steaming the milk, something I learnt on the barista course. The aim is first to stretch the milk (that is, put air into it) and then to heat it. If you put too much air in, it will be too foamy. The trick is to have the nozzle close to the surface of the milk when stretching, then have it slightly deeper when heating, so that it stops incorporating air. Two minutes with Dhan showed me that I was consistently putting the nozzle too deep to start with, hence I wasn’t stretching the milk enough.
Once you’ve got the milk correctly steamed, you can start actually doing some latte art. We concentrated on something simple, the heart, which is just as well, since right now I’m still mastering the blob at home. The trick, Dhan told me, was to swirl the cup before pouring, which breaks up the crema on the espresso. Pouring slowly at first establishes the base, the rich, brown colour on which you’re going to draw the pattern. When it comes to the pattern itself, you need to pour quickly. Any time you’re drawing a line, for example through the centre of a heart or tulip, this needs to be done really quickly and decisively.
What I learnt from Dhan is that I’m way too timid when pouring the milk. If I’m to get anywhere beyond the blob, I need to be much more aggressive in my pouring, something which I guess will come with practice and confidence. The other thing I learnt is that I need to be less horizontal., both when steaming and pouring. When steaming, the jug needs to be tilted to ensure the air mixes with the milk and when pouring the cup needs to be tilted towards the jug.
Now all I need is practice…
Find out what happened when man took on machine after the gallery.


 1
1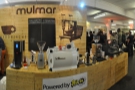 2
2 3
3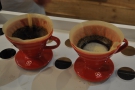 4
4 5
5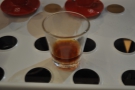 6
6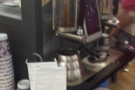 7
7 8
8 9
9 10
10 11
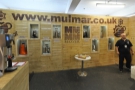
11Those with a long memory will recall that I featured the Steampunk, from Alpha Dominche, in last year’s London Coffee Festival round-up. The Steampunk is a high-tech brewing machine which is aimed at producing consistent, high quality filter coffee and, as we shall see, tea. To highlight its qualities, the UK distributor, Mulmar, arranged a challenge: Man vs Machine, to see who could brew the best coffee.
I looked in on the third day when Luke, from Caravan, was brewing some Colombian El Jardin through the V60 and comparing it the same coffee through the Steampunk. Samples were then being handed out at random to the crowd, who were asked which they preferred. The scores were then chalked up on the board.
I tried several samples from each and, I have to say, I couldn’t see a lot in it, which was also the verdict of the crowd, Man narrowly edging Machine, 27-25!
Perhaps more interestingly, I’d called by the day before, when both man and machine were brewing tea. There were two teas on offer, an Indian Darjeeling and a Chinese Jade Tips from the Good & Proper Tea Co. Once again, I could tell no difference, but the tea folks were raving about the Steampunk which, they believed, could brew tea more consistently and in half the time taken to do it manually. Good & Proper sees great applications in busy tea shops, where the ability of the Steampunk to brew quickly and consistently, while switching effortlessly between recipes is invaluable.
If you think that’s over stating the case, then consider how many single-origin pour-overs a top-flight coffee shop will offer. Four or five tops? With maybe two or three brew methods. Now consider the number of teas that a good tea shop will carry. 10? 20? 50+? If you then consider the number of variables, including brew time and water temperature, you might see why Good & Proper is so enthusiastic!
If you liked this post, please let me know by clicking the “Like” button. If you have a WordPress account and you don’t mind everyone knowing that you liked this post, you can use the “Like this” button right at the bottom instead. [bawlu_buttons]
Don’t forget that you can share this post with your friends using the buttons below.
Really good to have your comments. I missed loads of these places so thanks for drawing then to my attention. I loved the assembly stand too. Liking the steam punk take on tea.. We have over 50 types in the roastery shop so I will certainly check it out! Thanks Brian!
Pingback: London Coffee Festival 2015: La Cimbali Sensory Sessions | Brian's Coffee Spot
Pingback: Coffee Break Delirium + Assembly at Leyas | Brian's Coffee Spot
Pingback: London Coffee Festival 2015: The Cups | Brian's Coffee Spot
Pingback: London Coffee Festival 2015: The Coffee | Brian's Coffee Spot
Pingback: London Coffee Festival 2015: Round-up | Brian's Coffee Spot
Pingback: Cup North 2015 Part III | Brian's Coffee Spot
Pingback: London Coffee Festival 2016: Preview | Brian's Coffee Spot
Pingback: London Coffee Festival 2016: Coffee | Brian's Coffee Spot
Pingback: London Coffee Festival 2015: The Kit | Brian's Coffee Spot
Pingback: Coffee Lab, Winchester | Brian's Coffee Spot
Pingback: London Coffee Festival 2017: Coffee Experiences | Brian's Coffee Spot
Pingback: London Coffee Festival 2018: Preview | Brian's Coffee Spot
Pingback: Coffee Lab, Winchester | Brian's Coffee Spot