 I first met Vadim Granovskiy in 2014 at a London Coffee Stops Awards event, where he gave a fascinating presentation on the ibrik, or cezve, as Vadim prefers to call it. A few days later, I had the pleasure of watching Vadim win the Ibrik Competition at the London Coffee Festival, which only confirmed my interest in this unique way of making coffee. So, when I caught up with Vadim at this year’s London Coffee Festival and he offered me a private cezve lesson, I jumped at the chance!
The cezve is an ancient method of making coffee, with more in common with the stove-top moka pot than espresso or modern pour-over methods. My lesson took place one evening in early May and although the focus was the cezve, it wasn’t all about making coffee. We explored the cezve itself and how to look after it, as well going on a journey of taste and perception which was every bit as fascinating as, for example, the Cimbali sensory sessions at this year’s Coffee Festival.
As well as the intensive lesson I had, Vadim also runs introductory workshops for 10-15 people. For more details, take a look at his website www.coffeeinaction.com.
You can read more of my thoughts after the gallery.


, you need to weight it...")

 1
1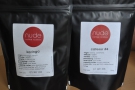 2
2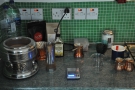 3
3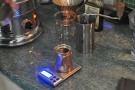 4
4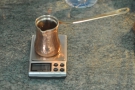 5
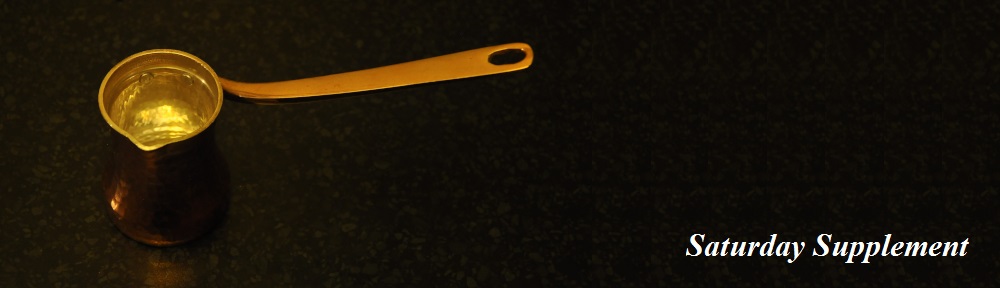
5Cezve is a Turkish word, referring to the pot used to make the coffee. Originally an Arabic invention, it was adopted by the Ottoman Empire, which is where the modern cezve was born. These days it’s very popular in Turkey, Iran and Syria and is in use across central and Eastern Europe. Consisting of a small pot, narrower at the top than the bottom, with a long handle, the cezve can be made of various materials, including aluminium, steel and ceramics, although the most popular (and expensive) is copper, preferred for its excellent heat conductivity.
Vadim is part of a small company which manufactures high-quality (and very beautiful) cezve. Each is hand-crafted from a single sheet of 1.5mm thick copper, giving excellent temperature stability. Since copper reacts with the acids in coffee, it’s essential to coat the inside with a more inert material. Tin and pewter are frequently used, but Vadim prefers a 15 micron silver coating. As long as you look after it (only use wooden implements for stirring and hand-wash without detergent) it should last you 10 years before needing re-lining.
The lesson was very focused: there were just two of us, myself and a lady called Oksana, and we spent several hours with Vadim. Before we made any coffee, Vadim took us through the basics: your cezve may be the best in the world, but if you use bad coffee or poor water, the end result won’t be good. We had three single-origins to play with, all from Nude Espresso: a Kenyan, Colombian and Brazilian. Vadim also stressed the importance of good water, explaining the role of the total dissolved solids (TDS) in your water. Typical tap water has a TDS of between 300-400 mg/L, while for manual coffee brewing, you need somewhere between 50-200 (less for espresso). For the lesson, we used Volvic, with a TDS of 130.
We were now ready to start. You can see how we got on after the gallery.


 1
1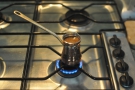 2
2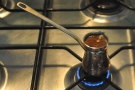 3
3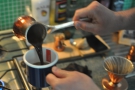 4
4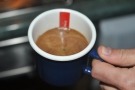 5
5We got down to the actual business of making coffee. First step, grind your beans. The grind needs to be fine, finer than for espresso if possible. Vadim used a hand-grinder, the Ultimate, from a German company called Odin, which, I have to say, ground beautifully, but made the most awful noise!
For Vadim, grinding is part of the experience and ritual of making coffee for yourself. If you only see the coffee once it’s been made (such as in a coffee shop), you miss out on so much, such as the aroma of freshly-ground coffee.
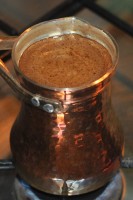
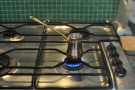
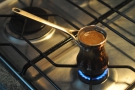
We started with the 80ml cezve, the smallest in Vadim’s range. The recipe’s simple: 6g coffee, 80ml cold water (for other sizes, scale up). There’s no pre-heating, just weigh the ground coffee into the cezve, pour in 20ml of cold water, wait 15 seconds, then top it up to the lower rivet (where the handle joins the body of the cezve). Then put the cezve over a small gas burner on a low heat and wait.
The brewing process takes about four minutes. For the first minute or so, you need to carefully watch your cezve, stirring with a wooden implement to break up any clumps of coffee that float to the surface, but being careful not to touch the inside of the cezve. By then a rich crema should be forming on the top, effectively sealing the cezve. From now on, you shouldn’t disturb the coffee. When the crema reaches the top of the cezve, it’s done. Remove from the heat and serve. If you find the process is taking significantly less than four minutes or significantly more, lower or increase the heat accordingly.
The cezve brews with a rising temperature, compared, say, to espresso (constant temperature) or pour-over/cafetiere (dropping temperature). In that respect it’s similar to the other stove-top method, the moka pot. Unlike all those methods, though, the cezve is unfiltered, so the coffee grinds remain in contact with the water even after serving. The coffee’s therefore still brewing to some extent, so the flavour changes with time, rewarding those who sip their coffee slowly rather than downing it in one!
Having learnt the basic technique, it was time to play. See what we got up to after the gallery.

 and left-handed.")


 1
1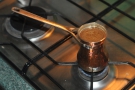 2
2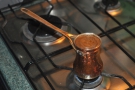 3
3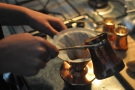 4
4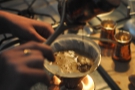 5
5 6
6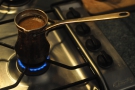 7
7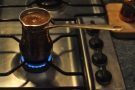 8
8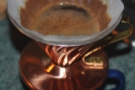 9
9Once we’d learnt the basic technique, it was a case of repetition, with Vadim insisting that Oksana and I make the coffee, rather than watching him do it. Vadim also took us on a tasting/sensory journey. First of all, we tried the different single-origins. Even my notoriously undiscerning palette could tell the difference between the three, with the Kenyan standing out. It was really juicy, with a good body and it matured wonderfully as it cooled, when it started tasting of apples!
We also played with flavour enhancers to bring out different elements of the coffee. The aim wasn’t to convert us to anything in particular, but to demonstrate how you can play with coffee and flavours to get some startling effects, much as the Cimbali sensory sessions had done.
First, Vadim produced some sublime sugar. From Bali, it was made from coconut palm flowers and had a very gentle sweetness to it, something I could have happily eaten raw all evening! We added 2g to our ground coffee before adding the water. I’m still not convinced by putting sugar into coffee, but it really made for a very delicate, sweet drink.
Vadim also got us to try a dash of freshly-extracted ginger juice, which is how he takes his coffee in the mornings. We used the Colombian and poured the brewed coffee onto a few drops of juice. Again, I wasn’t convinced, but the ginger came through really strongly. It wasn’t unpleasant, I just think it’s not for me.
Next, it was the turn of nutmeg. We used the Brazilian, adding a tiny amount of freshly-grated nutmeg to the ground coffee. Once brewed, we then filtered it through a V60, producing a rich, dark, smooth drink that was very well-balanced and completely different from the Brazilian on its own.
Finally, we tried the Kenyan with coconut nectar (from the same coconut flower as the sugar). We brewed the coffee on its own, then filtered it through the V60 onto the syrup. Vadim had us try it straight out of the cup, when it was acidic (too acidic for me) and fruity. Then we stirred it to mix in the syrup before trying it again. This time the taste was markedly different, the sweetness of the syrup taking the edge off of the acidity and producing a much more pleasant drink!
Using my Cezve at Home
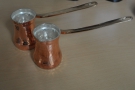
After all that, I was hooked, so naturally I had to buy one of Vadim’s cezve to take home with me. If you’d like one, they’re available from www.coffeeinaction.com in four sizes: 80ml, 120ml, 200ml, 350ml (mine is 120ml). It’s a bit of an investment, but no more so than a decent hand-grinder and they look beautiful in your kitchen!
I’d love to regal you with my adventures at home with my cezve, but sadly I’ve been so busy since then, plus I’ve been away in America, that I’ve not had the time. However, when I do eventually get around to it, I’ll be sure to come back and let you all know how I got on!
In the interests of disclosure, while I paid full price for my cezve, my lesson with Vadim was free.
For a rather different take on how to use the cezve, check out this article on Perfect Daily Grind.
Finally, if you want to learn more about making coffee at home, take a look at my Coffee at Home pages.
If you liked this post, please let me know by clicking the “Like” button. If you have a WordPress account and you don’t mind everyone knowing that you liked this post, you can use the “Like this” button right at the bottom instead. [bawlu_buttons]
Don’t forget that you can share this post with your friends using the buttons below.
The copper cevze does look gorgeous and it sounds like great fun to start to master a new brewing technique! Like you, I’m not too fond of sugar in my coffee but I don’t mind so much when it’s a Turkish coffee.
I’m having fun with it now that I’ve finally got around to buying a gas ring diffuser (all of my gas burners were too big!).
Regarding the sugar issue, I really do think that there’s a different between adding sugar to brewed coffee and infusing the sugar into the coffee while you’re brewing it.
Pingback: Caffeine Magazine | Brian's Coffee Spot
Pingback: Beyond the Bean Barista Bursary | Brian's Coffee Spot
Pingback: Birmingham Coffee Festival 2019: Food Glorious Food | Brian's Coffee Spot
Pingback: Grinding Coffee at Home | Brian's Coffee Spot
Pingback: Making Coffee at Home: Espresso | Brian's Coffee Spot
Pingback: Making Coffee at Home: Moka Pot | Brian's Coffee Spot
Pingback: Ben Rahim, Berlin | Brian's Coffee Spot