 In what is likely to become a common refrain this year, I’m heading back to America, this time flying to Boston in World Traveller Plus (premium economy to you and me) with British Airways, returning the same way in mid-February. This isn’t quite a repeat of the trip I made at the end of the last year, since back then I flew to Atlanta (with British Airways, in World Traveller Plus), so that’s something. And for those who are keeping count, this is the first time I’ve flown to Boston in World Traveller Plus (albeit I’ve done the journey a few times the other way).
I’ll be spending three weeks in Maine with Amanda (as opposed to spending the same three weeks by myself in Guildford) and I’m actually flying today, so this is a pre-flight post (rather than the flight itself, which will be the subject of its own Travel Spot) detailing everything you have to do before flying during the COVID-19 pandemic. It’s not quite as involved as last time (when it also merited its own post), but it’s worth explaining the process, particularly for those who might be travelling for the first time in the near future.
As usual, I’ve split this post into several sections, covering the various steps I had to take before I could head off to the airport:
- ESTA and Advance Passenger Information
- Booking my Pre-flight COVID-19 Test
- Doing a Video-supervised Test at Home
- VeriFLY App
- Online check-in
You can read all about the ESTA and advance passenger information after the gallery.


.")


 1
1 2
2 3
3 4
4 5
5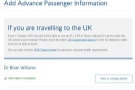 6
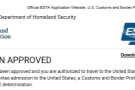
6Getting an ESTA and providing advance passenger information is pretty much business as usual if you’re used to flying to America. ESTA (Electronic System for Travel Authorization) is the USA’s system for visitors who don’t have/need a visa. An ESTA is valid for two years and since I got one when I flew to Atlanta in November, mine was still valid (if you want to know more about applying for an ESTA, take a look at my pre-flight post from November).
The advance passenger information is basically details of where you’ll be staying in America (you only need to provide this for the first night post-arrival, rather than having to give your full itinerary), along with contact information. This used to be collected on the visa waver form you filled out on the plane (which has been replaced by the ESTA) so now airlines are mandated to collect it at least 24 hours before departure. I got an e-mail reminder from British Airways at the weekend, filling out the form online on Monday morning, three days before my flight.
Unfortunately, the COVID-19 pandemic has complicated matters, so whereas that would have been it, other than checking in online, now you have to go through several additional steps (which are specific to the USA, although most countries have similar requirements). Note that I’m writing this as someone who is fully vaccinated/boosted against COVID-19, so all I need for entry into the USA, other than my ESTA, is proof of vaccination and a pre-flight COVID-19 test. At the time of writing (and to the best of my knowledge), unvaccinated travellers are not allowed into the USA unless they meet a very limited set of exceptions.
The only change to the COVID-19 restrictions since I flew in November is that the rules around the pre-flight test have been tightened. Previously, you could get your test at any point within 72 hours of your flight. Since 6th December, you must take the test within one calendar day of the flight’s departure (that is, on the day before the flight leaves, rather than a strict 24 hours before departure).
You can see what I did about my test after the gallery.


 phone number.")


. I chose 13:00...")


.")

 1
1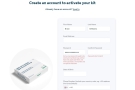 2
2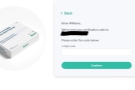 3
3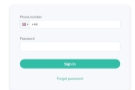 4
4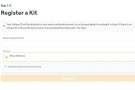 5
5 6
6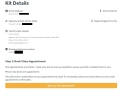 7
7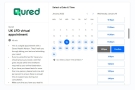 8
8 9
9 10
10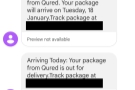 11
11 12
12 13
13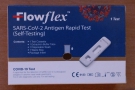 14
14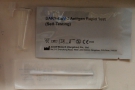 15
15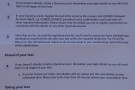 16
16For a pre-flight COVID-19 test, the USA only requires one of the quicker (and hence cheaper) lateral flow tests (also known as an antigen test). When I last flew to America, I took an in-person test at Heathrow, but this time I didn’t have easy access to the airport, so decided to do a home test.
Once again, I picked a test from those on offer on the British Airways website, which offer discounts for British Airways passengers. One thing to be aware of is that the test must be video supervised, so as well as buying the test itself, you have to book a video appointment (which you do after you’ve bought the test). This makes it slightly more expensive, but still cheaper than the in-person test (£24.65 vs £32).
I ordered my test on Monday, which, given that I was flying on Thursday and had to take the test on Wednesday, was leaving it a bit late. I suppose, in extreme circumstances, I could have taken my test on Thursday morning, although that would have been cutting it very fine indeed! I went with Qured as the test provider, which claimed next day delivery for orders placed before 13:30, which meant that my test was due to arrive on Tuesday, giving me a little leeway if things went wrong.
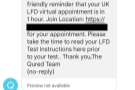
As it was, I woke up to a stream of reassuring text messages, tracing my test’s progress, which arrived at midday. I’d booked my video slot for 13:00 the following day, since I had calls in the afternoon and wanted to do it daylight. One of the things that the person on the other end of the call has to check is what’s written on the (small) test cassette, which I thought was best done in good lighting (as it turned out, I had too much light and had to half close my curtains!).
The process is straightforward, although, like all things COVID-19 related, it involved multiple steps. In fairness to Qured, the e-mails take you through the process step-by-step, starting with creating an account (which you need to access in order to upload your test result), registering your test and booking your video appointment.
The process has a few minor wrinkles, all of which are simple things to get right, which makes the fact that they are done bady all the more annoying! One example is requiring your password to have at least one special character, but without defining what a special character is. There’s also no option to see the password you have typed, which is frustrating. Another is the requirement to enter a verification code sent to your e-mail (the first code that was sent went into my spam folder…) but then using your mobile number (which isn’t verified) as your login.
The last one is requiring you to enter your “Unique ID” (sent by e-mail) to register your test kit. Except there’s no “Unique ID” anywhere in the e-mail. There is a “unique registration code”, but are they same thing? It turns out that they are, but this one really bugs me, since avoiding errors like this is my day job. While it was easy enough for me, as a native English speaker, to work out that they are the same, I wonder how easy it for non-native speakers. Why is it so hard for processes like these to use the same term for the same thing?
Anyway, my test had been ordered, registered and delivered. You can see how the actual test went after the gallery.


 1
1 2
2 3
3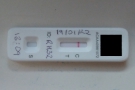 4
4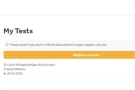 5
5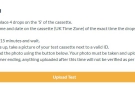 6
6 7
7 8
8 9
9 10
10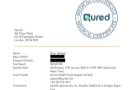 11
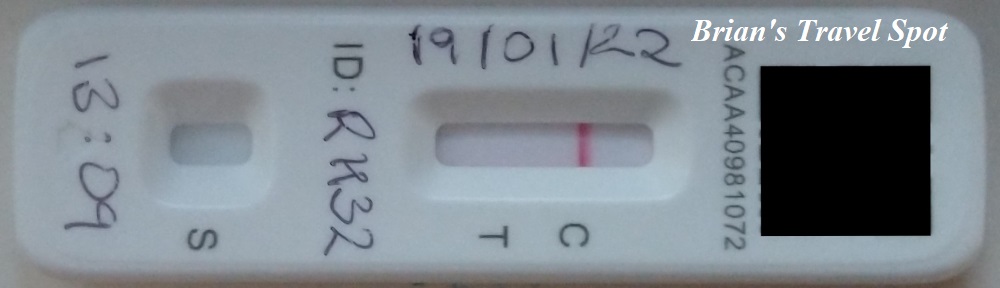
11The test is a standard lateral flow test, although I note that this one requires you to swab both nostrils, not your throat and one nostril. Just in case you’ve managed to make it through the last two years without having to do one of these, you carry out the swabbing, place the swab in a small test tube with some liquid at the bottom, swirl the swab around for 15 seconds, remove it, then place a few drops of the liquid (four in this case) from the test tube onto the test cassette.
This is all supervised on video, so you need to have either a phone or laptop with a webcam (I used my laptop), as well as a pretty good signal. Once you’ve placed the drops onto the cassette, you start a 15-minute timer, then write the date, the time of the test and an ID code on the cassette, which your supervisor verifies. This is the end of the video supervision, but there are still a couple of steps to go.
Once the 15-minute timer expires, you have ten minutes to photograph your test result (the cassette with hopefully just the one line; two lines means that you have tested positive for COVID-19) along with a photo ID (I used my passport) and upload it to the Qured account that you created when you registered the test.
Qured will then verify the test and generate a certificate which you can download from your account. In theory, you’re supposed to allow up to two hours, but I got an e-mail within 15 minutes. When I logged back into my account, it immediately showed the result (negative) which is a nice touch. Clicking on the test took me to a summary page with the details of the test, plus a link to download the all-important certificate which I needed before I could fly.
With my test out of the way, all I had to do was upload all my details into VeriFLY and I would be good to go. You can see how that went after the gallery.


, the test has been accepted.")


 1
1 2
2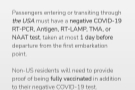 3
3 4
4 5
5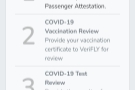 6
6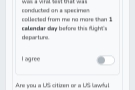 7
7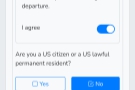 8
8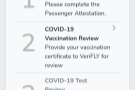 9
9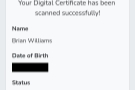 10
10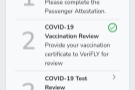 11
11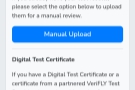 12
12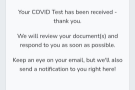 13
13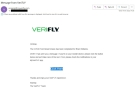 14
14 15
15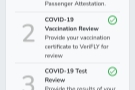 16
16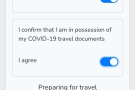 17
17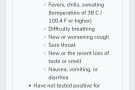 18
18 19
19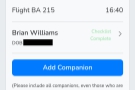 20
20 21
21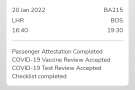 22
22I used the VeriFLY app for the first time when I flew to America in November. Since then I’ve become used to how it works, so I won’t go over it again, but if this is your first time, then I wrote a dedicated post about it. Note that you don’t have to use VeriFLY (I didn’t when I flew to Iceland in July), presenting your test and vaccination certificates for a manual verification at check-in, but I wouldn’t recommend it since it really slows things down. There’s also something reassuring about knowing that everything is in order before you get to the airport rather than risking the check-in staff turning you away at the last minute because your certificate isn’t valid!
I created my trip on Monday morning, with the aim of uploading my COVID-19 vaccination certificate ahead of time. However, whereas this was the first step when I used VeriFLY in November, the order had changed, and now the first step is to attest that you have received a negative COVID-19 test, something which I technically couldn’t do until after I’d completed my test on Wednesday. The downside with this is that it didn’t leave me very long between getting my test result/certificate and my actual flight should anything go wrong with the rest of the process. Which, of course, it did…
As soon as I’d downloaded my test certificate from Qured, I went back to VeriFLY and completed the attestation. The next step was to upload my COVID-19 vaccination certificate, which you can generate with the NHS app. Only I couldn’t get the NHS app to work! Every time I tried to log on, it fell over, saying it couldn’t verify the version.
In something of a panic, I tried the NHS website, which sent a text message with a verification message to my phone. Except, of course, it was under exceptional load, so the texts with the code (which expires after 10 minutes) weren’t being sent/reaching me in time… On the third attempt, I got the code, logged into the website and was able to generate my vaccination certificate. Panic over!
[As an aside, I have since checked the NHS App and it appears to be working normally.]
Next, I had to upload my test certificate. Despite Qured being “compatible” with VeriFLY (which is one of the reasons I chose it), I still had to manually upload a copy of my certificate, which was then manually checked by VeriFLY (as opposed to a digital certificate, which the app can automatically verify, like the vaccination certificate). VeriFLY suggests that this can take up to four hours, but I received an e-mail saying that it had been accepted in less than ten minutes, which is impressive (the last time I did this, it took an hour). The app itself also generates a notification, in case you’re away from your e-mail.
All that was left was the final checklist for the airport, which consists of a couple of declarations and a passenger attestation, basically asserting that you haven’t got COVID-19, haven’t been told to isolate, etc (which used to be a separate step). I duly completed the final step and was rewarded with my VeriFLY pass, showing that I’m good to fly.
All the remained was to check-in online and I was done. You can see how that went after the gallery.


.")


 1
1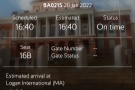 2
2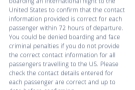 3
3 4
4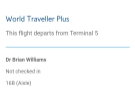 5
5 6
6 7
7 8
8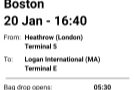 9
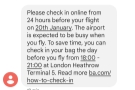
9Online check-in is pretty routine having been around for many years, although British Airways was pushing it very heavily before my flight. There’s a lot of sense to this since the airline wants to minimise the checks that are carried out at the airport. Like VeriFLY, online check-in does require a little bit of effort and coordination ahead of time, but it does smooth your progress through the airport (and, like the VeriFLY app, if everyone does it, it helps to keep the queues short).
I’d already been prepped a few times by both e-mail and text, including a text message, two days before I was due to fly, offering me the chance to check a bag in at Terminal 5 between 18:00 – 21:00 the day before my flight. However, since I’m always a last-minute packer (for example, I’m going to pack once I’ve uploaded this Travel Spot), I decided to forgo that particular option.
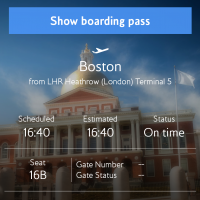
By mid-afternoon, I had all my ducks in a row, so had to wait a couple of hours for 16:40 to roll around, when I checked in using the British Airways app on my phone. I haven’t always had the best of experiences with online check-in, particularly when using apps, but the British Airways app is a dream, including a rather nifty seat picker (although I’d carefully chosen my seats when I’d booked the flights, one of the perks of Gold status).
So that was it. I was checked in, had generated my VeriFLY pass and was ready to go (apart from packing, of course). If you want to know how I got on at the airport and how the flight to Boson went, check out the next instalment of this Travel Spot. You can also see what I got up to during my time in Maine on the trip’s Travel Spot page.
If you liked this post, please let me know by clicking the “Like” button. If you have a WordPress account and you don’t mind everyone knowing that you liked this post, you can use the “Like this” button right at the bottom instead. [bawlu_buttons]
Don’t forget that you can share this post with your friends using buttons below.
Hi Brian – very interesting. The video – is it of you swabbing your nostrils, dealing with the swab afterwards, or both?
Cheers
Mike.
Both. They don’t supervise the whole process, just the key stages.
Pingback: Brian’s Travel Spot: Back to Boston in Premium Economy | Brian's Coffee Spot
Pingback: Brian’s Travel Spot: Flying to America During the COVID-19 Pandemic | Brian's Coffee Spot
Pingback: Brian’s Travel Spot: Flying to Boston in Economy | Brian's Coffee Spot