 The very first Making Coffee at Home post I wrote, before I even knew I’d create a whole Coffee at Home section for the Coffee Spot, was a simple guide to making better coffee with the cafetiere. To this day, for all the fancy pour-over methods I have at my disposable, or other immersion methods, such as the AeroPress or Clever Dripper, not to mention my home espresso machine, the cafetiere (or French Press), is still my go-to method for making my morning coffee.
One of the complaints I regularly hear about the cafetiere is that it’s difficult to clean up after a brew. This is something that I’ve never understood, since disposing of the used grounds in a cafetiere is ridiculously easy. Okay, so it’s not quite as simple as tossing a used paper pour-over filter, grounds and all, or popping an AeroPress puck into the compost, but it’s less hassle than, say, cleaning a reusable cloth filter.
So why does the cafetiere have a reputation that it’s difficult to clean up? I suspect it’s because lots of people don’t actually know how to dispose of the used grounds, so to rectify that, I’ve written this little guide.
You can find out how to clean up your cafetiere after the gallery.
 a cafetiere full of used coffee grounds and...")
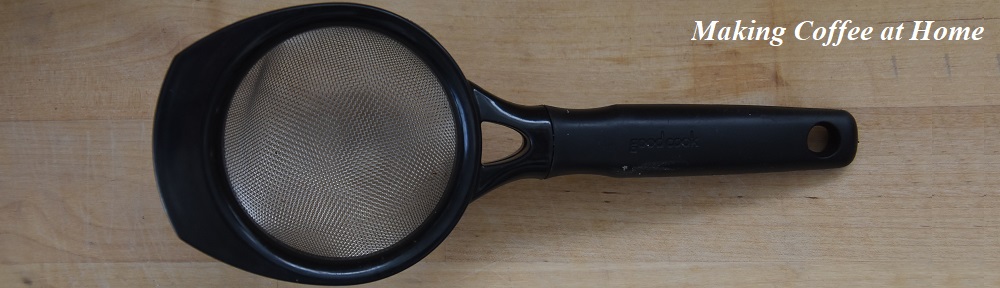
 a humble tea-strainer.")

 Hand-modelling by Amanda is not required (but is very useful!).")


 1
1 2
2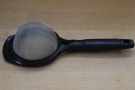 3
3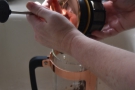 4
4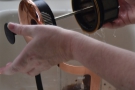 5
5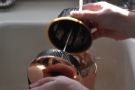 6
6 7
7 8
8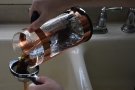 9
9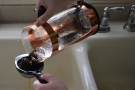 10
10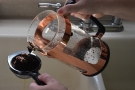 11
11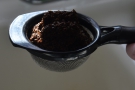 12
12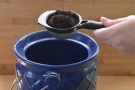 13
13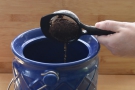 14
14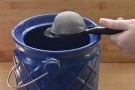 15
15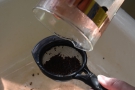 16
16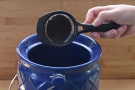 17
17 18
18In some ways, I’m embarrassed to write this post, because, to me, it’s so obvious. It’s not something that I claim in any way to have invented, by the way: a quick internet search will show you plenty of articles with this technique or similar. But the fact remains that many people will tell you that cafetieres are difficult to clean up after a brew, the main problem being how to dispose of the used grounds, which is the subject of this post (regular cleaning/maintenance of a cafetiere, ie washing it, is another subject and something else which I’ve never found to be particularly difficult…).
All you need to clean up your cafetiere is a source of water, a tea strainer (or a fine-mesh sieve) and somewhere to put the grounds once you’re finished. You can, by the way, dispose of them in the rubbish, but I recommend home composting or including them with your general food waste if you don’t compost. The only exception to this is when I’m travelling, in which case I flush them down the toilet rather than put them in a bin for some poor cleaner to find… And never wash them down a sink, where they can cause clogging (been there, done that: sorry, housekeeping).
With that out of the way, here’s my simple guide for disposing of the used grounds in a cafetiere. First of all, rinse the plunger under the tap. You can do this separately, or, if you want to minimise water use, catch the water in the cafetiere as you rinse. Then add some more water to the cafetiere and swirl it around (you can also stir it if you like) to loosen the grounds. Finally, pour the water/grounds mixture through your tea strainer or sieve and you’re done, although if you’re flushing them down the toilet, you can skip this step and dump the lot straight into the bowl.
And that’s it. It really is that simple. So, what do you think? It is difficult? Have I missed something? Was this so obvious that it didn’t need to be said? I’d love to hear your thoughts.
If you liked this post, please let me know by clicking the “Like” button. If you have a WordPress account and you don’t mind everyone knowing that you liked this post, you can use the “Like this” button right at the bottom instead. [bawlu_buttons]
Don’t forget that you can share this post with your friends using buttons below.