
 Welcome to another instalment of my Coffee at Home series (which now has its own page on the Coffee Spot). I started three weeks ago with a simple guide to the cafetiere to help (non-coffee) people who have unexpectedly found themselves at home all day due to COVID-19 make good coffee. I’ve also published articles on the importance of grinding coffee at home, as well as a guide to the Clever Dripper, another simple, reliable method. Today it’s the turn of the AeroPress, one of the coffee world’s favourite preparation methods (it’s even got its own World Championship!).
I’m a big fan of the AeroPress, so much so that I have three of them (one for home, one at my Dad’s and one that forms an integral part of my travelling coffee kit). However, it wasn’t always the case. I got my first AeroPress at the end of 2012, when I visited Leighton Buzzard’s House of Coffee, but I really didn’t get on with it. In fact, had it not been for a chance encounter at the Caffé Culture Show in May of the following year, I might have given up on it entirely. So, what changed? And why?
You can find out after the gallery.


, funnel (right) and stirrer.")
.")
 1
1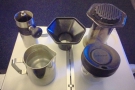 2
2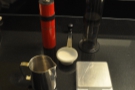 3
3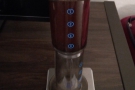 4
4 5
5 6
6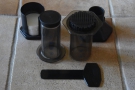 7
7 8
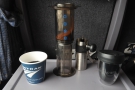
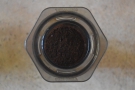
8Unlike my two previous posts on the cafetiere and Clever Dripper, which were more guides on how to use them, this is more about how not to use the AeroPress (although don’t worry, I will give a simple how-to guide at the end). For those not in the know, the AeroPress is a simple device, invented in 2005 by Alan Alder, the man behind the Aerobie. It (the AeroPress, not the Aerobie) consists of two plastic cylinders which fit one inside the other. The larger, outer one has a hexagonal base, with a turn-on filter cap, while the inner one has a rubber seal at one end. The package also comes with a handy paddle for stirring the coffee, a hexagonal funnel (which we’ll come to), a pack of 350 filter papers (to go in the filter cap) and a scoop for measuring the coffee (which I never use).
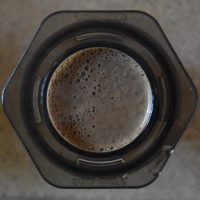
The basic principle behind the AeroPress is simple: put a filter paper in the cap, put the cap on the outer cylinder, put ground coffee in the outer cylinder, pour in water, fit the inner cylinder into the outer one and then, when the coffee is ready, push down on the inner cylinder. This forces the brewed coffee through the filter and, hey presto, it’s done!
As usual, the devil is in the detail. While the principle is simple, there are literally hundreds of AeroPress recipes out there, each with its own unique combinations of parameters: amount of coffee, amount of water, water temperature, grind size, length of brew… The list goes on. However, that’s not why I struggled initially. I struggled because I believed what I read on the packaging and because I followed the instructions in the box. And therein lies the problem.
Before I go on, let me say that if you do follow the instructions, use the AeroPress the way it was designed to be used, and enjoy the resulting coffee, then please don’t let me, or anyone else tell you that you’re doing it wrong (ie ignore the rest of the this post). At the end of the day, coffee is, and always will be, a matter of personal taste. If you’re making coffee you like to drink, then you’re doing it right.
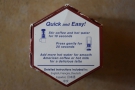
With that proviso out of the way, what does the box say? Well, it claims “AeroPress produces a remarkably good espresso-style coffee” which, in my opinion, simply isn’t true. I should extend this by saying that nothing, in my experience, makes espresso-style coffee other than an espresso machine. This is as true for the AeroPress as it is for the stove-top moka pot, the various capsule machines and other preparation methods that produce short, black coffee. Take my cà phê phin, the traditional Vietnamese cup-top metal filter. This can produce excellent, short, black coffee, but espresso it isn’t.
So that was my first mistake. I believed the packaging. I made and drank my AeroPress coffee as if it was espresso and I was constantly disappointed. Because it wasn’t espresso. It’s the same, by the way, with any preparation method. Take capsule (aka pod) machines. With the right capsules, these can produce some excellent coffee, but it’s not espresso. I found that once I stopped thinking of it as espresso, and being disappointed as a result, I really enjoyed (some) capsule coffee.
What was my second mistake? You can find out after the gallery.


...")


 1
1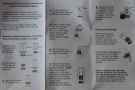 2
2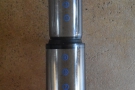 3
3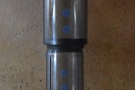 4
4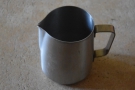 5
5 6
6 7
7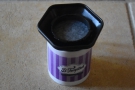 8
8My second mistake was following the instructions that I found inside the box. This recommends using one scoop of finely ground coffee (around 15g) and about 75ml of water heated to around 80°C. You add the water, stir for ten seconds, then plunge. And that’s it.
I followed this recipe for about five months and was on the verge of giving up when I visited the Caffé Culture Show. I came across TKC Sales, the UK AeroPress distributors, watching them for a few minutes while they used the AeroPress to make coffee. And it was nothing like the way the instructions said! That, for me, was the turning point.
Pretty much everything in the instructions is, in my opinion, wrong, from the ratio of coffee to water (not enough water), through the temperature of the water (not hot enough) to the brewing time (far, far, far, far, far too short). About the only thing I’d agree with is the amount of coffee, the AeroPress being good for around 15g (and, in its defence, the scoop that comes with the AeroPress holds roughly 15g of ground coffee).
So, let’s start there. For 15g of coffee, the classic ratio of coffee to water gives you 250ml of water, which, incidentally, pretty much fills my AeroPress to the top, so that’s good. For temperature, I use 92°C, the same as for my cafetiere and Clever Dripper recipes, where you’ll also find a handy method for cooling down boiling water. When it comes to grind size, I grind relatively fine (finer than for either the cafetiere and Clever Dripper, but nowhere near as fine as for espresso). You’ll find some guidance in my home-grinding guide, but as a rule of thumb, I’d say around the consistency of granulated sugar.
Next, prepare the AeroPress. Stand the inner cylinder on end, then fit the outer cylinder carefully to the top of it. You want a good seal on the rubber, but don’t press it down too far. I recommend warming the assembled AeroPress by pouring some hot water in the top and leaving it to stand while you grind the coffee.
The final preparation step is to rinse the filter paper with hot water (if you don’t want to use a disposable paper filter, there are metal alternatives such as the Aerdisc which I use when I’m travelling). Back to the paper filter. To rinse, put the filter cap in the top of the funnel, put the paper in the cap, then pour the water from the warmed AeroPress through the filter. We’re now ready to go.


 1
1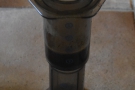 2
2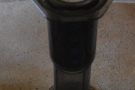 3
3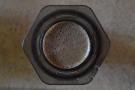 4
4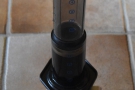 5
5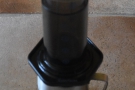 6
6I use the inverted method (type “Inverted AeroPress” into any search engine and you’ll get lots of recipes), which means that I brew the coffee with the filter facing upwards, flipping it over just before plunging. This contrasts to the standard method (which is how the instructions say to do it), where you set the AeroPress with the filter facing down on top of your mug or jug. The disadvantage with this method is that the filter lets some of the water through as the coffee brews, so you end up with partially brewed coffee in your mug, although in defence of the AeroPress, if you follow its instructions and only brew for 10 seconds before plunging, this makes no real difference.
However, back to the inverted method. Stand your AeroPress with the filter end pointing up and put the ground coffee in. Then add around 60ml of water. If you don’t have any scales, you want to go to the bottom of the second number on the side of the AeroPress. Give it a stir to thoroughly wet the grounds then leave the coffee to bloom for about 20 seconds.
Next fill the AeroPress almost to the top, which should give a total of 250ml of water. Give it another stir and wait another minute (so a total of 80 seconds have elapsed since you started). This is an immersion brewing method, much like the cafetiere and Clever Dripper, although the total brewing time is much shorter (the Clever Dripper is 2½ minutes, the cafetiere 4 minutes), which is one of the reasons the AeroPress uses a finer grind (the finer the grind, the more coffee comes into contact with the water, so the shorter the brewing time can be).
Don’t worry too much if you go over the 80 seconds by a bit. Like the other two methods, the AeroPress is pretty forgiving. While you’re waiting, you can attach the filter lid with its rinsed filter paper and then you’re ready for the plunge. However, to do this, you first need to invert your AeroPress so the filter is pointing downwards.
I recommend using the funnel for this: simply put it on top of the AeroPress then invert the whole ensemble, placing it onto your mug (or, my preferred receptacle, a metal jug). However, you can just invert it without using the funnel, although I find the funnel much easier.
Please do take care when you do this though. In seven years, I’ve had three spills, and trust me, near boiling water pouring over your hand is not fun. It also makes one hell of a mess! For similar reasons, I recommend not using a glass carafe: having had one shatter during the plunging, that too makes one hell of a mess!
You’re now ready to plunge by pressing down on the AeroPress with a steady pressure, which can take anywhere between 10 and 20 seconds. If you find yourself putting your whole weight into the push, you’ve probably ground too fine, while if there’s very little resistance, you’ve gone too coarse. When you reach the very end, the AeroPress gives a satisfying hiss as it expels the last the coffee along with any trapped air. Personally, I stop just before this point, but it’s very much up to you.
And that’s it. Now you know how to use (and how not to use) the AeroPress. It’s an extremely versatile method which rewards exploring and playing with recipes (seriously, just type “AeroPress recipes” into any search engine and you’ll find so many variations).
However, to get you going, here’s a 15 minute video from European Coffee Trip with nine (very) different ways to use your AeroPress. If you prefer a written recipe (and with much prettier pictures than mine), here’s another simple guide, this time from Sprudge.
If you liked this post, please let me know by clicking the “Like” button. If you have a WordPress account and you don’t mind everyone knowing that you liked this post, you can use the “Like this” button right at the bottom instead. [bawlu_buttons]
Don’t forget that you can share this post with your friends using buttons below.