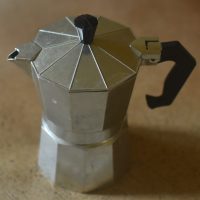
 Up until now, Making Coffee at Home has focusedon brew methods which I regularly use: cafetiere, Clever Dripper, AeroPress, pour-over and espresso. Today’s post is different since I’m writing about the moka pot, something which I own, but stopped using many years ago, unhappy with the results. I moved onto other brewing methods and my moka pot has sat at the back of a shelf ever since.
My interest was initially rekindled by tweets from Phil Wain (editor of Caffeine Magazine) which got me thinking that maybe I should write about the moka pot after all. I began the Making Coffee at Home series with a desire to help people make good coffee at home, particularly people who are new to making good coffee. Although I’ve tried to take you on a journey through the various preparation methods I regularly use, I know that not everyone will have the time to invest in learning a new method. Similarly, many of you won’t want to buy new coffee equipment. However, I suspect that, like me, plenty of you have a moka pot somewhere in your kitchen. So, I got my moka pot down, dusted it off and here we are…
You can see how I got on with my moka pot after the gallery.


 1
1 2
2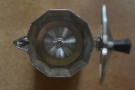 3
3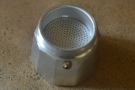 4
4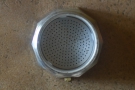 5
5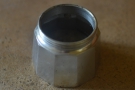 6
6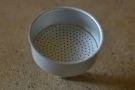 7
7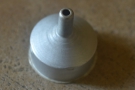 8
8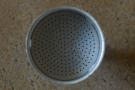 9
9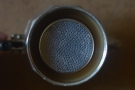 10
10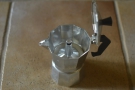 11
11When I started my Making Coffee at Home series, I wrote about methods that I used on a regular basis, partly because I wanted it to be personal and partly because I’m lazy and didn’t want to have to learn a new brewing method. The first five entries in the series are therefore my personal experience: it’s the what, how and why of my home coffee making. I’ve never claimed to be an expert barista and I don’t see myself as an authority, so this style suited me very well.
I can’t do that with the moka pot. Other than my experience of probably a decade ago, which left me feeling that the moka pot didn’t make very good coffee, I really had nothing to add until a week ago, which is when I got mine out from the back of the shelf. So this is less “here’s my tried and trusted methods” and more “here’s what I found out”…
The moka pot, which was invented in Italy in 1933, is sometimes known (erroneously in my opinion) as a stove-top espresso maker, erroneously because, as I’ve said before, it doesn’t make espresso. That’s probably why I struggled with it all those years ago: like my AeroPress, I was expecting it to taste like espresso and was disappointed when it didn’t.
So how should you view the moka pot? Well that’s a very good question, and one I set out to answer last week, when I tried various beans in side-by-side comparisons with other brew methods. Given my existing prejudice against the moka pot, I was expecting disappointment, but the fact that I’ve written this post might give you a clue that my expectations were confounded!
You can see what I found out after the gallery.

...")
.")
 1
1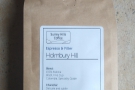 2
2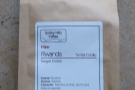 3
3I began with my tried and trusted filter methods and, using the same beans, made one cup my usual way and one in the moka pot (using the recipe given at the end of this post). And this is what I found…
- AeroPress: I started my comparisons with my AeroPress, which I typically use in the evening to make my decaf. Using a Colombian Sugarcane decaf from Hundred House Coffee, I made my first moka pot in over 10 years. I don’t think I got it quite right, the resulting coffee being a little muddy in texture, but it wasn’t too bad. I tried again the following evening and was more impressed, but I still preferred the taste and mouthfeel of the AeroPress.
- Cafetiere: next I moved onto my cafetiere, which I use each morning for my first coffee of the day. I was using the Holmbury Hill blend from Surrey Hills Coffee and was very surprised at how different it tasted through the moka pot. This brought out the flavours more than the cafetiere, albeit at the cost of a little body and a much shorter drink (we’ll come back to that).
- V60: I skipped the Clever Dripper in favour of the V60, representing the pour-over and used another Surrey Hills Coffee, this time a washed Rwandan single-origin. Like it had with the cafetiere, the moka pot brought out quite different taste from the coffee, the resulting drink being much brighter and more tart, although it lost much of the subtly as a result.
Although I enjoyed the coffee that I made, I’ve concluded that the moka pot can’t really be thought of as a filter method. Using the moka pot, each coffee tasted very different and was a lot shorter, which had a big impact on my perception of it.
Typically, for a filter method, I would expect to get around 220 grams of coffee from a 15 gram dose, where I was getting 75 grams from the moka pot, which is a very different drink. That meant that I felt like I was comparing apples and oranges.
Next, I turned my attention to espresso, which you can read about after the gallery.


 1
1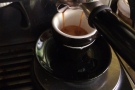 2
2 3
3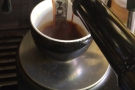 4
4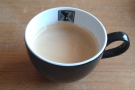 5
5 6
6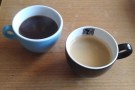 7
7If I’m honest, and perhaps coloured by my previous negative experiences, I really expected not to like the moka pot in comparison to espresso. Once again, my expectations were confounded, and I was very pleasantly surprised. I used the San Lorenzo Colombian single-origin from Curve Coffee Roasters (which I’d been enjoying as my daily espresso, using my Sage Barista Express). I discovered that it was surprisingly good, the moka pot exhibiting the same flavour profile as the espresso, although it lacked some of the intensity and mouthfeel.
If I’d thought about it in advance (rather than just going with my prejudices) this lack of intensity/mouthfeel shouldn’t have been surprising. For a typical espresso, I get 34 grams out for 17 grams in, a 2:1 ratio, whereas the moka pot was giving me a 5:1 ratio, so of course it wasn’t going to be as intense, nor have that thick, syrupy mouthfeel of a good espresso.
What did I know that was closer to a moka pot? An Americano, of course! I very rarely drink Americanos, much preferring my espresso undiluted, but since I was experimenting, I made one on Thursday, using equal parts water to extracted espresso, giving me roughly a 4:1 ratio. Of all the drinks I made, this one came closest in taste to the moka pot, although the moka pot couldn’t quite match the richness of the mouthfeel. Nevertheless, it was still pretty close.
So what did I learn? Well, the moka pot, when used correctly and with good coffee beans, makes really good coffee, which came as something of a surprise to me. I found it helps not to think of it as equivalent to any particular method: for me, it is its own drink, a short, intense coffee (if I were to give it a name, I’d say a lungo). Like capsule coffee, once you stop thinking of it as something else, and judge it on its own merits, it’s pretty decent!
While I can’t see it replacing my morning cafetiere, afternoon pour-over, daily espresso or evening AeroPress, I am seriously considering taking my moka pot up to my Dad’s when the COVID-19 pandemic is over. Since I don’t have an espresso machine there, I miss out on my daily espresso, so I may use to make an equivalent to my daily espresso, a short, intense drink to have at the end of the afternoon.
Of course, there was a big caveat in my conclusions: when used correctly. So how do you make good coffee in a moka pot? Find out after the gallery.


.")


 1
1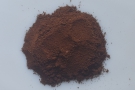 2
2 3
3 4
4 5
5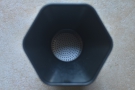 6
6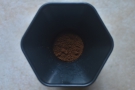 7
7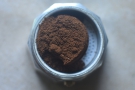 8
8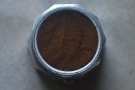 9
9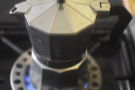 10
10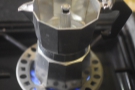 11
11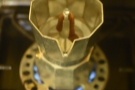 12
12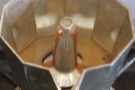 13
13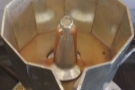 14
14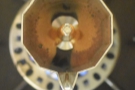 15
15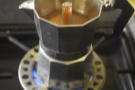 16
16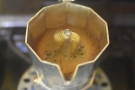 17
17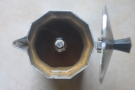 18
18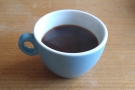 19
19I started this post by saying that up until now, I’ve written from personal experience, describing how I make coffee with a particular method. Since I only started using the moka pot a week ago, this clearly isn’t the case for this post. For what follows, I am indebted to the one-and-only James Hoffman. In particular, I refer you to this video he made for ChefSteps at the end of 2015. The recipe I use is almost identical to the one that James describes, so if you want to hear it from the horse’s mouth, so to speak, or you prefer videos for your recipes, just watch James. If not, then carry on…
The only things you’ll need for this recipe are a moka pot (I forget where I got mine, but they are widely available, and in a variety of sizes, with the smallest ones starting at under £20), a kettle and a heat source. I also recommend scales and, in particular, a grinder. Note that most moka pots are aluminium, so they won’t work on induction hobs, although you can get stainless steel versions which do. You can also get electric ones.
I’ve been using my moka pot on my old gas stove, along with a gas ring reducer trivet which concentrates the heat from the larger burner onto the smaller base of the moka pot. I bought this about five years ago for £5 to use with my cezve. Note that I say you’ll need a kettle: James is a proponent of the hot water method, where you pour hot water into the base of the moka pot. There are also adherents to the cold water method; if you choose to go down this route, you won’t need a kettle.
Start by grinding your coffee: for my moka pot, I find that 15 grams fills my basket, but this will depend on the size of the pot. I use a grind that is midway between AeroPress and espresso (see my guide on home grinding for more details). I’ve not played with the grind size at all, but as a general rule, if the coffee is coming through really quickly, it’s too coarse and if it comes through really slowly, it’s too fine.
While I’m grinding the coffee, I boil the kettle. You don’t have to worry about the precise temperature of the water: just pour it into the base of the moka pot, up to the level of valve, then put the basket in and fill the basket with the ground coffee. It should come to the top of the basket: smooth it down, but don’t tamp it.
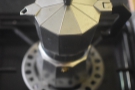
Next, screw the top half of the moka pot onto the base, remembering that the base now has very hot water in it, so use a cloth to hold it! You need to ensure that the top is screwed tightly on by the way. Light your gas ring (or equivalent), place the moka pot on top and off you go.
Note that this is not a method that you can just walk off and leave. You need to watch and listen, so it’s important that you keep the lid up so you can see what’s going on in the upper chamber. Out of sight, inside the moka pot, the water is building up pressure, which is forcing it through the ground coffee and then up the central spout, from where it oozes out into the upper chamber.
In the brews I was making, it took around 90 seconds for the first coffee to appear. If you’re using the cold water method, this can take around five minutes. Either way, once the coffee starts oozing out, things happen very quickly. While the coffee is oozing, all is good. As soon as it starts bubbling or spluttering, it’s done. In my brews, this was taking 30 seconds from the coffee first appearing.
Immediately the coffee starts bubbling or spluttering, take it off the heat and run the base under the cold tap. This will reduce the temperature and stop the brewing process. If you let it run on, the coffee will become bitter.
Now all you have to do is serve and drink. Simple.
Before I go, a word on the cold water vs hot water methods. As an introduction to the cold water method, I suggest this article by Alex from La Bottega Milanese, which first appeared in Caffeine Magazine. In it, Alex is adamant that cold water gives better-tasting results. In his video, James is adamant that using cold water will make the coffee more bitter. And if want a third take on things, here’s the recipe which Phil Wain (who started me on this) reckons is the best.
At the end of the day, it all comes down to taste. I’ve not used the cold water method and since I really liked the coffee I made with the hot water method, I’m going to stick with that. Plus it’s a good deal quicker!
If you liked this post, please let me know by clicking the “Like” button. If you have a WordPress account and you don’t mind everyone knowing that you liked this post, you can use the “Like this” button right at the bottom instead. [bawlu_buttons]
Don’t forget that you can share this post with your friends using buttons below.