
 Two weeks ago, I launched my Coffee at Home series (which now has its own page on the Coffee Spot) with a simple guide to the cafetiere to get you started, followed by a piece on the importance of getting a grinder at home. As I explained in the cafetiere guide, it works well for bold coffees (I typically use it with espresso blends) but less well for subtle or delicate single-origins. So today I’m taking you one step further with a method that’s more suitable for those subtle/delicate single-origin coffees.
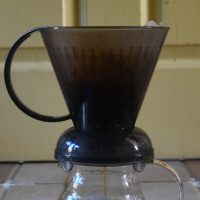
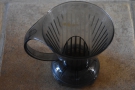
I’ll be honest: there are plenty of excellent filter methods out there, each with its own set of devoted fans. There’s the AeroPress, V60, Chemex and Kalita Wave to name a few. However, today I’m writing about the Clever Dripper, which, in my opinion, is the easiest method for those of you taking your next steps into home-brewing. Like the cafetiere, it doesn’t require any fancy equipment, other than the Clever Dripper itself and some filter papers. It also shares other important characteristics with the cafetiere: it’s simple, reliable and, above all, very forgiving. All you really need is coffee, a mug, kettle and a timer (plus, ideally, a grinder).
You can read more of my thoughts after the gallery.


.")


 1
1 2
2 3
3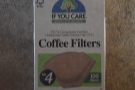 4
4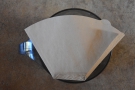 5
5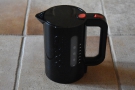 6
6 7
7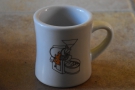 8
8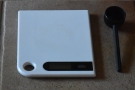 9
9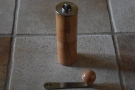 10
10Before I start, a word about the other methods, just in case anyone thinks I’m dismissing them. I love my AeroPress and V60, and I have nothing against the Chemex, Kalita Wave and any other pour-over filter you care to mention, all of which can be used to make excellent coffee. However, in my opinion, none are as straightforward as the Clever Dripper. With the Aeropress, for example, you really need to throw away the instructions and find yourself a good inverted recipe (which can be fiddly), while with my V60, I struggled mightily until I acquired a gooseneck kettle. In contrast, I hit the ground running with the Clever Dripper and I’ve never looked back, using it on a regular basis.
For the method I’m about to present, you only really need a mug, a kettle and the Clever Dripper itself (available from multiple independent UK roasters and other suppliers for around £20), along with some filter papers. You’ll also need to measure/weigh the coffee. If you don’t have any digital kitchen scales, a coffee scoop will do. Finally, you’ll need to time your brew: my fancy scales have an in-built timer, but when I’m travelling, I use the timer on my smartphone. Alternatively, you can always count.
Just like my cafetiere method, I’m using the classic ratio of 18 grams of coffee to 300 ml of water (300 ml being the standard size of a UK mug or US diner mug). I’ve also borrowed much of this recipe from my post about the cafetiere, so I apologise if you’ve seen some of this before. If you’re making coffee for two, you can’t quite double the amounts since the Clever Dripper only has a capacity of 500 ml (so use 30 grams of coffee). While my fancy scales measure to 0.1 of a gram, if you only have scales that measure to an individual gram, don’t worry: being slightly out is okay. Finally, if you don’t have any digital scales, 18 grams is roughly two scoops of coffee.
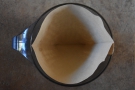
The only additional thing you’ll need is a supply of filter papers. In part I chose the Clever Dripper because it uses standard coffee filter papers that you can find in many supermarkets. These have a ridge along the bottom (unlike the V60, with its own filter papers, which taper to a point) and come in sizes 2, 4, 6 and so on. I prefer size 4 papers (which fit exactly into the Clever Dripper), but I also use size 2 papers. The ones I used in this post (and, indeed, am currently using) are from If You Care, which I picked up from Sarah’s Caring Coffee.
Now you’ve got everything together, you can start making coffee. I’ll begin by describing the original method I used when I wrote this post in April 2019. However, since then I’ve changed how I use my Clever Dripper, instead following the Ultimate Clever Dripper Guide from James Hoffman. You’ll find that method described after the original one.
You’ll find a step-by-step guide to my original method after the gallery,


 1
1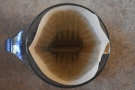 2
2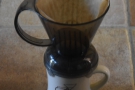 3
3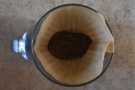 4
4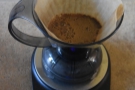 5
5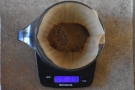 6
6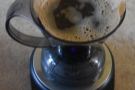 7
7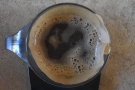 8
8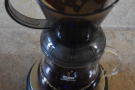 9
9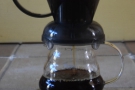 10
10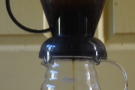 11
11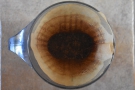 12
12Begin by boiling the water. While the kettle is boiling, fold down the edges of your filter paper and put it in the Clever Dripper. Pour in some hot water (it doesn’t have to be boiling), maybe a quarter to half a mug, and leave it to stand for at least 30 seconds. This rinses the filter paper and warms up the Clever Dripper.
While you’re waiting for that, weigh out and grind the coffee beans. I use a medium grind (the same that I use for a V60: you’ll find some pictures/advice in my guide to grinding coffee at home). Put the Clever Dripper on top of your mug to drain, then, once it’s drained, put the ground coffee into the filter paper.
If you already know my cafetiere method, you can skip the next part, which is all about ensuring the water is at the right temperature.
Once the kettle has boiled, you’ll need to cool the water down a bit. With my temperature-controlled kettle, I set it to 92°C, but you don’t have to be this precise. The important point is not to pour hot water straight onto the ground coffee. There are various methods of cooling the water, the most common of which is just to let the kettle stand for 30 seconds. However, this is what I suggest.
Pour the hot water from the kettle into your mug (having first discarded the drained water). This serves three purposes:
- it warms the mug
- it cools the boiling water
- since the mug holds 300 ml, it saves you having to measure out how much water you need
Start by pouring about a fifth of the water from the mug into the Clever Dripper and start your timer/counting. Give the resulting mixture a good stir, ensuring that the coffee grounds are thoroughly wetted. This is known as letting the coffee bloom. After 30 seconds, pour in the rest of the water, giving the coffee another stir. Then fit the lid and wait another two minutes (that’s 2½ minutes in total since you started your timer).
When the two minutes are up, put the Clever Dripper on top of your mug, which is where the clever part comes in. The Clever Dripper has a valve at the bottom, which is normally closed, keeping the water in the filter, where it brews the coffee. However, once the Clever Dripper is placed on top of something, as long as that something has a circumference smaller than the bottom of the Clever Dripper, it opens the valve and the brewed coffee immediately starts draining through the bottom of the filter. Once it’s all drained through, you’re ready to enjoy your coffee.
[True story: the first time I saw a Clever Dripper was at Brew Lab in Edinburgh and I didn’t know what it was or what it was called. When the barista, who was demonstrating it to me, put it on a carafe and it started draining, I said “ooh, that’s clever!”.]
Since writing this post in April 2019, I’ve changed the way I use my Clever Dripper, which I will explain after the gallery.


...")
.")
 and start the timer.")


 1
1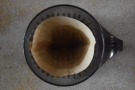 2
2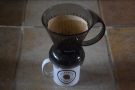 3
3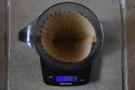 4
4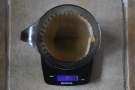 5
5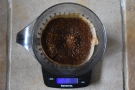 6
6 7
7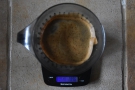 8
8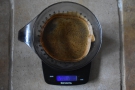 9
9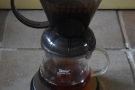 10
10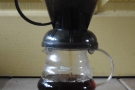 11
11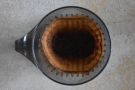 12
12This new method is taken from James Hoffman’s Ultimate Clever Dripper Guide, which you can find on James’ YouTube channel. If you want to find out more about the method, why I came to use it and what its main advantage is over my original method, please take a look at my Clever Dripper Revisited post.
As with the original method, you start by boiling the water, rinsing the filter paper and grinding your coffee. However, instead of putting the ground coffee into the filter paper, take your freshly boiled kettle and pour the water into the Clever Dripper first.
I use the same classic ratio of 18 grams of coffee to 300 ml of water. However, between writing the original post and updating it for the new method, I’ve run out of size 4 filter papers and am using size 2 papers instead. In theory, the size 2 paper can accommodate 18 grams/300 ml, but I use 275 ml of water to be on the safe side, which means I use 16.5 grams of coffee to maintain the ratio. This fills the Clever Dripper pretty much up to the rim of the filter paper, so if you want to be cautious, I suggest going for 15 grams of coffee and 250 ml of water.
Pour all the water into the filter paper in one go, immediately add the ground coffee, then start your timer/counting. Next, give the resulting mixture a gentle stir, ensuring that the coffee grounds are thoroughly wetted. Then you wait two minutes.
When the two minutes are up, put the Clever Dripper on top of your mug, which opens the valve and allows the brewed coffee to drain through, just as in the original method. And there you have it. A new, slightly easier, slightly quicker and more consistent way of using your Clever Dripper.
Whichever method you use, the resulting brew tends to be more subtle and delicate than a cafetiere, with less body. There’s also less sediment than a cafetiere since the filter retains all the ground coffee. Finally, it’s far easier to clean: just take the filter paper, plus ground coffee, and drop them in the compost before giving the Clever Dripper a quick rinse.
There’s slightly more that can go wrong with the Clever Dripper, but it’s still a very forgiving method. You can let it brew for longer and it’s not going to ruin it. The main variable is the fineness of the grind and here I use the draining time as a good indicator: if your coffee is draining really quickly, you’ve ground too coarse and if it drains really slowly, you’ve ground too fine. Ideally, I aim to have the bulk of the coffee drained through within a minute, which is much easier with the new method.
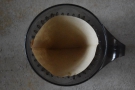
Finally, a good indicator that you’re getting it right is if you have a nice, flat bed of coffee in the bottom of the filter paper, although the best indicator of all (and the only one that matters) is how the coffee tastes at the end of the process!
If you liked this post, please let me know by clicking the “Like” button. If you have a WordPress account and you don’t mind everyone knowing that you liked this post, you can use the “Like this” button right at the bottom instead. [bawlu_buttons]
Don’t forget that you can share this post with your friends using buttons below.