 When I first made coffee at home, over 25 years ago, I used a cheap filter machine, but I didn’t like the taste its metal filter imparted to the coffee, so I switched to the cafetiere and never looked back. Years later, when I started experimenting with home pour-over and other methods such as the Clever Dripper, I naturally used paper filters (I’ve had the occasional metal filter but never got on with them).
For several years, I’ve toyed with getting cloth filters to use at home. However, inertia and a general sense that they were a bit of a faff compared to paper filters put me off (which is odd, since many of the other little rituals around making coffee don’t bother me). Then, on my last trip to see Amanda in November, we were in GoGo Refill, a low-waste store in South Portland, where I saw some cloth filters from CoffeeSock.
To cut a long story short, I bought a pair, one for a Chemex and one for a standard two-cup ridge-bottom filter (like my collapsible travel filter). After using them on and off for the last two months, I thought it was time to share my thoughts.
You can see what I made of them after the gallery.
 from CoffeeSocks. Note that you can...")
.")


 1
1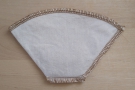 2
2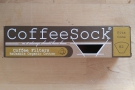 3
3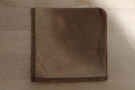 4
4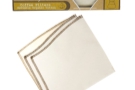 5
5 6
6 7
7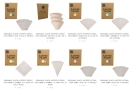 8
8Let’s start with what this Making Coffee at Home post is not about. The first concerns the green credentials of cloth filters. There are many claims about the environmental benefits of reusing cloth filters over disposable paper filters, but that’s not something which I’m qualified to assess. Secondly, I’m not going to tell you if cloth filters are “better” at making coffee than their paper counterparts, since that’s entirely subjective. Instead, I’m going to share my experiences and leave it up to you to decide on their merits.
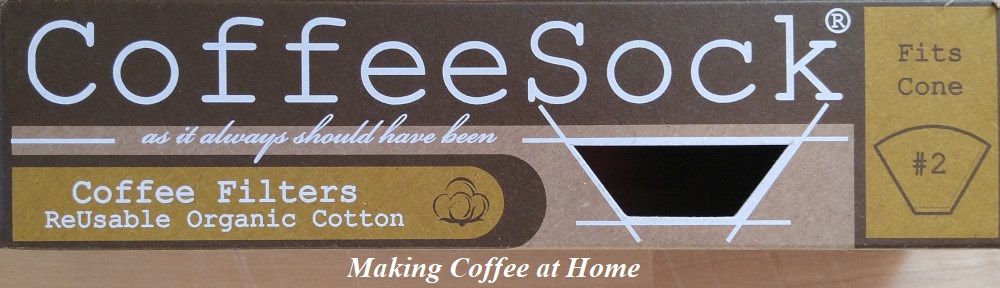
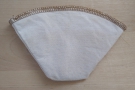
The cloth filters I bought from GoGo Refill are manufactured by a US company, CoffeeSock, although you can also buy them direct from its online store. The filters, which are made of 100% organic cotton and fit a variety of different brewers, come in pairs. Interestingly, they all cost $14 a pair regardless of size. There’s also a travel filter, which is a free-hanging single filter with a metal ring (and so needs no filter cone). It’s this, incidentally, which I think of as a “coffee sock”.
For those looking for a UK alternative, The Cloth Filter Co. makes a range of filters using an organic cotton and hemp blend, with prices starting from £8 for a single filter, depending on size. Earthtopia offers a European alternative, with a range of 100% hemp filters, sold in packs of three for €14.95. I’ve not used either, so can’t comment on how cotton/hemp or 100% hemp compares to CoffeeSock’s 100% cotton cloth filters.
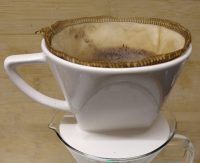
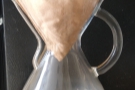
Back to the CoffeeSocks. These were an impulse buy, starting with the two-cup filter which I thought would be perfect for my collapsible travel filter. Since Amanda also has one (in fact, mine was a gift from Amanda), the fact that the CoffeeSocks came as a pair was perfect, meaning we each have one. Ideally, I wanted to buy a V60 filter too, but GoGo Refill didn’t have any. Instead, I bought a Chemex filter, despite not having a Chemex. However, there was a (semi-) sensible reason for this.
At my Dad’s house, I have another impulse purchase, a glass carafe which I bought from a supermarket and which came with a metal filter. I never got on with the metal filter (see my previous comments), but wondered if the CoffeeSock Chemex filter would fit it. In the meantime, I reasoned that I could use it in Amanda’s V60, which is what I did during the rest of the trip.
For the record, CoffeeSock has three Chemex filters, square ones (which I bought), half-moon ones (which are like a V60 paper in shape) and narrow ones for the small three-cup Chemex. And, although I didn’t know it at the time, the CoffeeSock website says that the square and half-moon filters will also fit a V60.
You can see how I got on with my CoffeeSocks after the gallery.
 is just like using a paper filter.")

.")


 1
1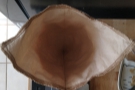 2
2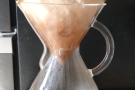 3
3 4
4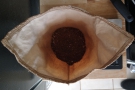 5
5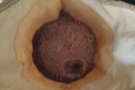 6
6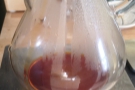 7
7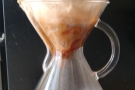 8
8 9
9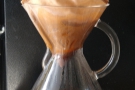 10
10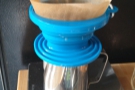 11
11 12
12The first thing to say is that there is no fundamental difference when making coffee with a cloth filter compared to a paper filter. All the steps are the same, including pre-rinsing the filter and warming the brewer, while for all the various brew methods, I just followed my basic pour-over recipe. The only real point of concern I had was whether to use the CoffeeSock with the seams on the inside or on the outside (I went with outside).
The main difference is the grind setting. How finely/coarsely you grind the coffee depends on many things, including the coffee itself and the brew method. The filter (paper or cloth) is just another variable. As well as making coffee on a day-to-day basis, I wanted to compare cloth and paper filters. However, my options were limited, since I was mostly brewing with the Chemex CoffeeSock, but in the V60. It didn’t seem right to compare the two, since a Chemex paper filter (which the Chemex CoffeeSock is designed to mimic) is much thicker than a V60 one, which meant that I wouldn’t be comparing like with like.
Instead I turned to the two-cup CoffeeSock and the equivalent paper filter which I used in my collapsible travel filter. Over a series of brews, I found that I had to grind a good deal finer for the CoffeeSock than for the paper filter. If I used the same grind, then the CoffeeSock drew down much quicker. In one example, using the same coffee and same grind setting, a pour-over with a paper filter completed in 3 minutes 40 seconds compared to just 1 minute 40 seconds for the CoffeeSock.
In another experiment, I adjusted the grind settings (using Amanda’s Baritza Encore) to achieve the same drawdown time (roughly three minutes). To achieve this for the paper filter, I had the grinder set to 22 compared to 16 for the CoffeeSock. This experiment also allowed us to make a direct comparison between the two brews.
We found them very similar, sufficiently similar that I’m not sure that I could have told them apart in a blind tasting (since I’d made them, I knew which one was which). Amanda, who was tasting them blind, said she found that the CoffeeSock gave a fuller flavour (in comparison, the paper filter was “diluted”), while I felt that the CoffeeSock gave slightly more clarity. Either way, we both (marginally) preferred the CoffeeSock over the paper filter.
You can read about the various brewing methods, how to maintain your CoffeeSock, and what my overall conclusions are, after the gallery.


 1
1 2
2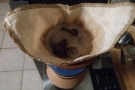 3
3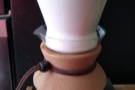 4
4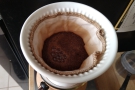 5
5 6
6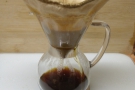 7
7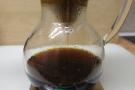 8
8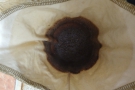 9
9 10
10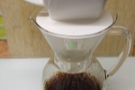 11
11 12
12 13
13 14
14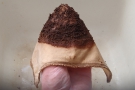 15
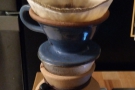
15For the majority of my time at Amanda’s, I used the Chemex CoffeeSock in a V60 to make coffee for two, although I also experimented with a ridge-bottomed ceramic filter that Amanda had and also made individual pour-overs with the collapsible travel filter. When I got back to the UK, I took the CoffeeSock to my Dad’s, where it proved to be the perfect fit for the glass carafe. In this instance, I used it much as I would a Chemex, with the CoffeeSock sitting in the top of the carafe. I also tried my two-cup Coffee Sock in one of my ridge-bottomed ceramic filters which I keep up there.
Finally, Amanda had a surprise for me when I got back to Maine last week. She’d only gone and bought a second-hand Chemex (which came with a metal filter; no prizes for guessing whether that’s getting any use). So, for the last week, I’ve been using the CoffeeSock as it was intended in a Chemex to make our coffee. Across the board, regardless of method, I’ve produced some very tasty and consistent brews using the CoffeeSocks with a variety of coffees.
So, we now know it’s capable of producing good coffee, but what’s it like using the CoffeeSock on a regular basis? Well, I started this piece by saying that I had a general sense that cloth filters were a bit of a faff compared to paper filters. With a paper filter, clean up is incredibly simple. You take the filter paper, along with the used grounds, and throw the lot in the compost. It really is very simple.
With the CoffeeSock, it’s a bit more involved. First you have to turn it inside out to get rid of most of the used grinds, then you can either rinse the rest off, or, in a neat trick that Amanda showed me, scrape them off with the blade of a knife. Finally, rinse the paper under running water until the water runs clear. In all, it takes me a couple of minutes, if that.
There is a difference of opinion on how to store cloth filters between brews. CoffeeSock recommends squeezing out the filter then hanging it up to dry, which is also Earthtopia’s recommended method. In contrast, The Cloth Filter Co.’s preferred method is to put the wet filter in a sealed container and store it in a freezer, although it also suggests that drying it then storing it dry will also work. All three advise boiling your filter in fresh water for 10 minutes every month (The Cloth Filter Co.), month and a half (Earthtopia) or two months (Coffee Sock) to remove any accumulated coffee oils. For what it’s worth, I’ve been following CoffeeSock’s recommendations and have had no problems so far.
In conclusion, what do I think? Well, if you haven’t already worked it out, I’m using the two CoffeeSocks on a regular basis. I think that the Chemex CoffeeSock will have a regular home, one for Amanda’s Chemex and the other in the glass carafe at my Dad’s. If I ever get back to travelling regularly, I’ll also take the two-cup CoffeeSock with me to use in my collapsible filter. As for the rest of the time, when I’m at home in Guildford, I’m still using my V60 with paper filters, but I am considering getting a cloth V60 filter to see how I get on with that.
For more information, check out the Pourover Blog’s take on CoffeeSocks, while way back in 2016, my friend John from Brewing Coffee Manually was writing about the Hario Woodneck Drip Pot and its cloth filter. If you prefer video, James Hoffman also really liked the Hario Woodneck Drip Pot. Finally, my friends at Carvetii Coffee Roasters have put together this video about cloth filters.
If you liked this post, please let me know by clicking the “Like” button. If you have a WordPress account and you don’t mind everyone knowing that you liked this post, you can use the “Like this” button right at the bottom instead. [bawlu_buttons]
Don’t forget that you can share this post with your friends using buttons below.