 Welcome to the latest instalment in my Making Coffee at Home series, which is all about storing coffee beans at home. Other than a post about keeping coffee beans in the freezer, it’s not something that I’ve written much about. Coffee’s twin enemies, when it comes to freshness, are air and light, so the standard advice, once you have opened a bag of coffee, is to store the beans in an airtight container away from directly sunlight.
Typically, I’ll put around 80 grams of beans into an airtight container, storing the rest in the original bag (which, if it’s not resealable, I’ll pop into a larger container) in the cupboard. This means I’m not exposing the bulk of the coffee to fresh air every time I open the bag/container.
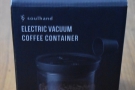
However, there is an alternative, which prompted me to the write this post. A couple of weeks ago, the folks at Soulhand offered me a vacuum canister. It’s something I’ve been thinking about getting for a while, so naturally, I jumped at the chance. Vacuum canisters, as the name suggests, work by removing (almost) all the air from the canister, which, in theory keeps the coffee fresh for longer.
In practice? Well, you can see what I made of my vacuum canister after the gallery.


, a coffee scoop and the instructions.")

.")


 1
1 2
2 3
3 4
4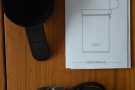 5
5 6
6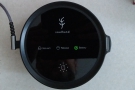 7
7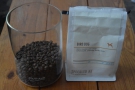 8
8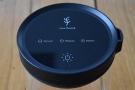 9
9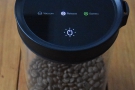 10
10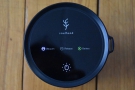 11
11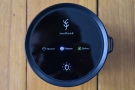 12
12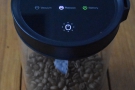 13
13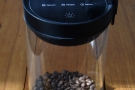 14
14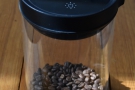 15
15 16
16One of the first things that I learnt about making coffee at home was the importance of grinding your own beans rather than buying pre-ground coffee. Ground coffee loses its freshness in a matter of days. In contrast, I’ve not really had a problem with whole beans going stale, certainly not at the rate at which I use them.
As I’ve said, I typically keep a portion of the beans in a small container, that way limiting how many of the beans I expose to (fresh) air each time I make coffee. Although this works reasonably well, the rest of the beans in the large container are still exposed to whatever air is in the bag/container, while those in the small container have the same problem, with the air being refreshed whenever I open it up to take out some beans.
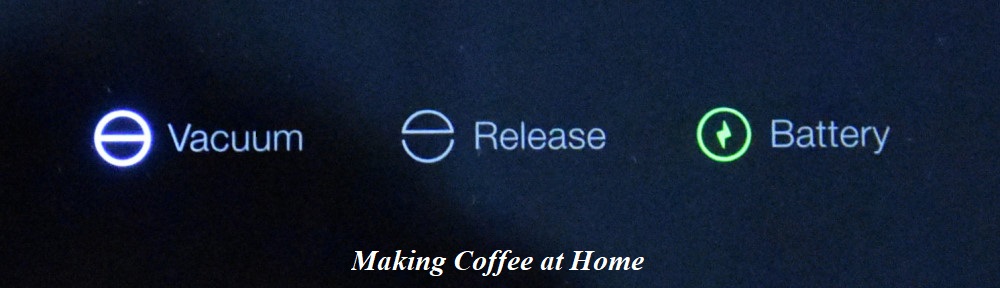
The vacuum canister resolves both these problems by removing all the air each time you reseal it. Although the beans are exposed to the air whenever you open the canister, this is really negligible. There are any number of canisters on the market with vacuum in the name, although be aware that not all of them actually create a vacuum. Of those that do, the majority have a manual pump mechanism in the lid, whereas the Soulhand vacuum canister is one of the few that uses a battery-operated pump, which is rechargeable using a standard USB-C cable.
The canister itself comes in two sizes, either 1.2 L or, in the case of the one Soulhand sent me, 1.6 L, which holds about 500 grams of coffee. The packaging implies either a clear glass jar (which I have) or a matt black one (which I would have preferred), although I can only see glass ones for sale on the Soulhand website. While the glass one is great for photographs (and lets you see how full the jar is), you really need to store it in a cupboard and certainly out of direct sunlight. The matt one, in contrast, can be stored on the counter-top, although I’d still keep it out of direct sunlight to prevent unnecessary heating.
Operation is pretty simple. Once you’ve charged and turned it on, fill the canister with beans, put the lid on and double-tap the power button. The pump in the lid then extracts the air in the canister, during which time the vacuum light flashes. When it stays illuminated, the extraction is complete, the whole process taking less than 20 seconds.
Before you can open the canister, double-tap the power button and air will be slowly let back in, which also takes just under 20 seconds. The release light flashes and, once illuminated, the lid can be removed. Take out the beans you need, pop the lid back on, double-tap the power button to start the vacuum cycle again and you’re done.
It really is that simple. Note that the lights go off after a little while as the unit goes into standby, so you can’t tell at a glance if the canister is sealed or not. However, if you tap the power button, either the vacuum (sealed) or release (unsealed) light will come on.
So that’s the Soulhand Vacuum Canister in theory. You can find out what it’s like in practice after the gallery.


 1
1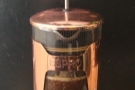 2
2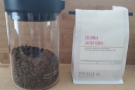 3
3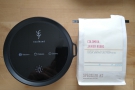 4
4 5
5 6
6 7
7 8
8 9
9 10
10I’ve had the canister for just under two weeks, using it every day. I thought that the tapping to open/reseal the canister, along with the resulting delay (compared to just snapping a lid on/off) might be annoying but it’s been fine. However, there was one morning when I forgot to complete the vacuum cycle (I’d put the lid back on, but was distracted and didn’t double tap).
The key question, of course, is whether the vacuum canister keeps the beans fresher than just storing them in a normal container. To test this, a week ago I opened a fresh bag of coffee (a rather fine aerobic process coffee from Colombia, the Javier Rubio, a gift from Speckled Ax when I visited last week). I put about 60 grams in one of my standard plastic containers, the rest going into the vacuum canister, which I then used every day to make afternoon coffee for Amanda and me (with hindsight, to make the comparison more realistic, every time I made coffee, I should have opened/closed the standard container too).
Typically I used Amanda’s Chemex to make coffee for two, but to see if there was any difference in freshness compared to the beans I’d stored in my plastic container, I made two identical single servings of coffee on days five and seven. Rather than the Chemex, I used our collapsible coffee pour-over cones and cloth filters. In one, I put beans from the vacuum canister and in the other, I used beans stored in my plastic container. I used the same grind setting and recipe, making the pour-overs side-by-side so that they would be at the same temperature, then had Amanda taste them both.
On both occasions, any differences were marginal (I really couldn’t distinguish between them, plus I already knew which was which). On the day five test, Amanda marginally preferred the beans from my plastic container, while on day seven, it was the other way around, the vacuum container coming out marginally on top (her description of the coffee was “livelier”).
To be honest though, one week isn’t really long enough to tell if vacuum storage makes a difference to the freshness, so I set up an experiment to see what difference it makes over a longer (seven week) period. However, my preliminary conclusion is that if you’re not really noticing any difference in quality between your coffee from when you open the bag until you finish it, then a vacuum canister is addressing a problem you don’t have.
Amanda and I go through a 250 gram bag of coffee in a week, while on my own, a typical bag can last a couple of weeks. I’m not sure that over these short time periods, vacuum storage makes that much of a difference. However, if you take a while to get through your coffee (for example, you have a coffee you only drink at the weekends), then a vacuum canister could be useful in prolonging the coffee’s freshness, although before making any decisions, you should read about the results of my experiment where I compared coffee stored in the Soulhand canister for seven weeks with two other storage methods.
The other question is whether the Soulhand canister is worth the investment. It’s the most expensive vacuum canister I’ve come across and it’s construction, looks and ease-of-use reflect that. Ultimately, whether it’s worth the extra compared to one of the manual models, is a decision that you’ll have to make for yourself.
Naturally, James Hoffman has already looked at vacuum canisters on his YouTube channel, along with a range of other coffee canisters, so I suggest you take a look at that for a broader comparison. As far as I’m aware, at the time James made his video (July 2020), the Soulhand vacuum canister was not available.
Don’t forget that you can share this post with your friends using buttons below, while if you have a WordPress account, you can use the “Like this” button to let me know if you liked the post.