
 My original travelling coffee kit was a pretty simple affair (by my standards, at least), consisting of my AeroPress, a ceramic hand grinder and a cheap set of scales. Over the years, I added to it, with the likes of my Travel Press, Aergrind hand grinder, a metal jug and, occasionally, an electric kettle joining the ranks. It got to the point that, four years ago, I even wrote an article about it.
The one thing my set-up lacked was the ability to do pour-over. This was rectified first by the gift of a collapsible metal filter cone, and then, on a trip to China two years ago, the purchase of a small (360ml) gooseneck jug. Suddenly, I could do pour-over on the go! However, while I was enamoured with my jug, I had my struggles with the filter cone, so when Amanda gave me another collapsible filter cone as a present at the start of last year, I immediately pressed it into use, keen to see how it compared to my existing metal filter.
You can see what I found after the gallery.


.")
 1
1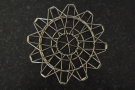 2
2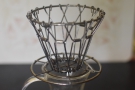 3
3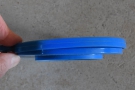 4
4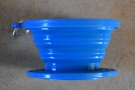 5
5 6
6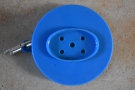 7
7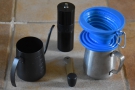 8
8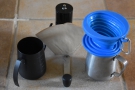 9
9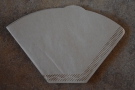 10
10The main issue I had with my original collapsible coffee filter (from Kikkerland) is down to its design. On the plus side, it’s light, strong and flexible, being capable of taking on numerous shapes, from the classic V-shaped cone (likes a V60), to the basket shape of a Kalita Wave. Unfortunately, when I tried to use it like a V60, I discovered its main design flaw: there’s no hole in the bottom. Instead of the filter paper sitting neatly in the cone, its tip protruding from the bottom, I had to fiddle around trying to get the paper in right place, an incredibly frustrating process.
I had more success using it like a Kalita Wave, but this requires Kalita Wave filter papers, which don’t fold flat. As a result, they take up quite a lot of space, which rather defeats the object of having a collapsible filter cone in the first place. I found success with a compromise technique using standard Filtropa filter papers. These fold down like the V60 papers, but, rather than narrowing to a point, they have a ridge at the bottom.
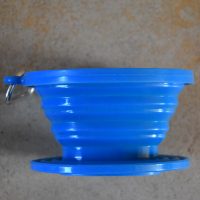
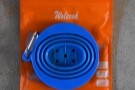
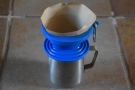
In contrast to the metal Kikkerland filter, my new filter (from Wolecok) is made from silicone and is designed, like a classic Melitta filter, to be used with the Filtropa papers (which have the added benefit, if you run out, of being widely available in supermarkets, at least in the UK and USA). It isn’t quite ridge-shaped at the bottom, instead being an elongated oval with five holes, one in the centre and the others arrange in a rectangle around it, but despite this, it provides an adequate fit for the filter papers.
In terms of weight and size when collapsed, there’s not a lot between the two, although the silicone filter is easier to expand/collapse (and makes pleasing noises when you do either). While I said that the metal filter was sturdy, I still worried about it getting bent out of shape when packed away in my luggage, so I always made sure that I packed it inside something. However, with the silicone filter, I have no such worries. You can scrunch it, bend it, squeeze it, twist it and it will just spring back into shape. It comes with a standard camping clip, so you don’t even have to pack it, just clip it on your belt or to strap on your rucksack.
As a result, I put it ahead of the metal filter in terms of design and robustness, although, as always, the most important question is how well does it make coffee? You can find out after the gallery.


.")

 and then continue adding small amounts...")


 in Febraury last year.")
.")

 1
1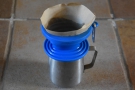 2
2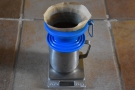 3
3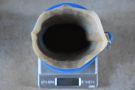 4
4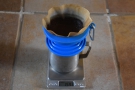 5
5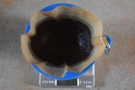 6
6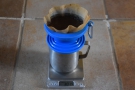 7
7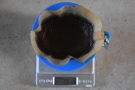 8
8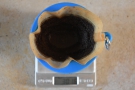 9
9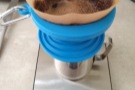 10
10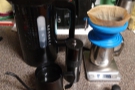 11
11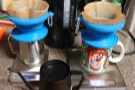 12
12I use my silicone filter in exactly the same way as I use my ridge-bottomed filter at home. I wrote about this in my post on pour-over, part of my Making Coffee at Home series, so I won’t repeat it here. I use the same method, tending to use the weight in method when travelling, although on the rare occasion I use it at home with a filter stand, I use the weight out method instead. I also use the same recipe of 18 grams of coffee to 300 grams of water.
The main difference between my silicone filter and the one I use at home is size. My home filter takes Size 4 filter papers, while the silicone filter takes the smaller Size 2 and even then, as you will have seen in the gallery, the paper extends some considerably way over the top of the filter. This has an impact on the method: for example, if you are using 300 grams of water, you will definitely not be able to use a single pour (unless you pour very, very slowly) since the filter simply isn’t big enough.
It also limits the amount of coffee you can make: realistically a single 300 gram serving is the upper limit. When I was making pour-overs for myself and Amanda using this filter, I simply made two pour-overs side-by-side (Amanda having also bought herself a silicone filter cone).
As I mentioned in my pour-over post, I find that my ridge-bottomed filter drains more slowly and is more prone to clogging than my V60 and so it is with my silicone filter. As a result, I tend to use a coarser grind than I would for either pour-over method at home. As a starting point, I’ll use my standard cafetiere grind (you’ll find some pictures/advice on grind sizes in my guide to grinding coffee at home) and, depending on the coffee and how quickly it is draining, I’ll go (slightly) finer from there if I need to.
Overall, I found my silicone filter easier, more convenient and less frustrating to use than my metal filter, although I still prefer using my V60 at home when I want a pour-over. However, if I’m going somewhere where I might want to make pour-over, it (and some filter papers) are definitely coming with me.
I used it extensively on my second trip to America last year, where it completely supplanted my metal filter. Sadly I’ve not been able to travel much since then, but, with the summer coming (and perhaps more importantly, COVID-19 vaccinations continuing at pace, at least in the UK), I’m hopefully that I’ll be able to get it out of hibernation and on the road with me at some point this year!
January 2022: I have bought a reusable cloth filter for use with my silicone filter so I won’t have to worry about running out of filter papers during my travels.
If you liked this post, please let me know by clicking the “Like” button. If you have a WordPress account and you don’t mind everyone knowing that you liked this post, you can use the “Like this” button right at the bottom instead. [bawlu_buttons]
Don’t forget that you can share this post with your friends using buttons below.