
 Welcome to another instalment of my Making Coffee at Home series. After a brief diversion to look at coffee itself, I’ve returned to coffee-making techniques. So far, I’ve written simple guides for the cafetiere, Clever Dripper and AeroPress. In contrast, today’s Making Coffee at Home isn’t focused on a single method. Instead, I’m looking at the broad category of pour-over filters, any device where you pour water over coffee grounds and it filters through the bottom.
There are many filter devices out there, made from various materials (plastic, glass, ceramic and metal) with a wide variety of designs. Pour-over is also one of the oldest coffee-making methods: the Melitta Filter, for example, was patented in 1908, making it older than the cafetiere (1929). These days, probably the most commonly recognised are the Chemex (invented in 1941) and the much more recent Hario V60 (2004).
One of the reasons I’ve left pour-over until now is that, after espresso, it’s the method I’ve struggled with the most, giving up on it for long periods. Although you can get away with making pour-over using just a kettle, filter and filter papers, this is one method where having the extra kit really pays off.
You can read more of my thoughts after the gallery.


 has two holes. Mine, in contrast, has three.")


 1
1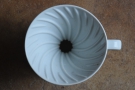 2
2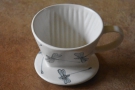 3
3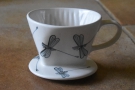 4
4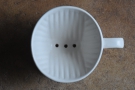 5
5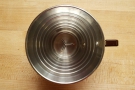 6
6 7
7 8
8 9
9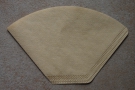 10
10Let’s start by looking at the various pour-over methods out there. I’m not going to list them all (that would require many, many articles in itself). Instead, I’m going to split them into three broad categories: conical, ridge- and flat-bottomed. In all these devices, the filter is effectively a structure to hold the filter paper, which does all the work (although you can also get reusable filters, usually made of metal). There are also cloth filter devices, which I’m not going to get into here, largely because I have no direct experience of them, having only come across them in coffee shops such as Café de L’Ambre (a traditional Japanese kissaten in Tokyo).
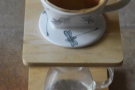
The V60 is a classic example of a conical pour-over device. It has a single hole in the bottom and it takes filter papers that taper to single point (for that reason, I include the Chemex in this class). The Melitta filter is an example of a ridge-bottomed filter, which has a v-shaped cone, ending in a ridge, which has several holes to let the coffee out (the Melitta has two, while the one I own has three). Finally, the flat-bottom filters have cones with (you guessed it) flat bottoms, again with holes in to the let the coffee out. For example, the Kalita has three holes. I don’t own a flat-bottomed filter (unless you count my cà phê phin, the traditional Vietnamese cup-top metal filter), so I’m indebted to Fionn of The Pourover for the picture of the Kalita Wave in the gallery.
They all operate in roughly the same way: you put ground coffee in the filter, pour hot water over the grounds and the water filters through, extracting the coffee as it goes. The shape of the filter, the number of holes in the bottom and the filter paper itself (eg what it’s made of, how thick it is) control how quickly the water filters through the coffee, which in turn controls how the coffee extracts. The faster the water comes through, the less extraction you will have.
In turn, this determines how fine you will need to grind your coffee. The finer the grind, the more of the coffee’s surface area comes into contact with the water and hence you get more extraction. So, as a general rule of thumb, the faster the water filters through, the finer you will need to grind.
Each method has its own adherents and its own strengths and weaknesses which I’m not going to get into here. Instead, I’ll look at what equipment you will need, which you can read about after the gallery.


.")


 1
1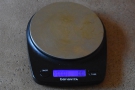 2
2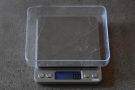 3
3 4
4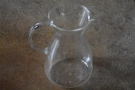 5
5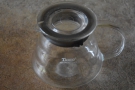 6
6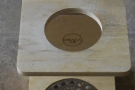 7
7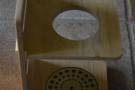 8
8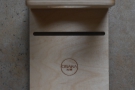 9
9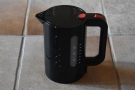 10
10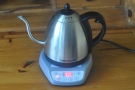 11
11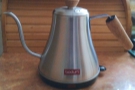 12
12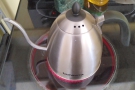 13
13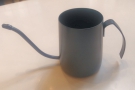 14
14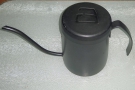 15
15In the opening section, I said that the grind will depend on the particular method. For that reason, I strongly recommend you get a good burr grinder. Although you can ask for coffee to be ground for pour-over, I’ve found being able to fine-tune my grind to the particular method (and, indeed, the particular bean) invaluable to getting great results.
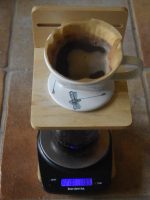
Similarly, I would strongly recommend getting some scales. All the other methods I’ve written about so far (cafetiere, Clever Dripper and AeroPress) are immersion methods, where you put a set amount of water in with the coffee. This means you can easily get away with using something like a mug to measure the water. However, for pour-over methods (as you’ll see), measuring how much water you use is much more important. Although I have made pour-over without scales, I find the results highly variable.
I’d also recommend getting a glass carafe, although you can simply make your pour-over into a mug/jug. However, I find being able to watch the coffee as it comes out of the filter very helpful in judging the speed at which it’s filtering, particularly if you don’t have any scales. In a similar vein, I’d recommend a good pour-over stand. Whether you need one or not depends on the method you use, but it is essential for my preferred method. I have an adjustable wooden stand from a brand called Osaka, while there are plenty of other options out there, although they tend to be in the £40+ range. Alternatively, you could make one yourself.
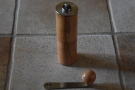
Finally, and I can’t stress this enough, get a gooseneck kettle. My pour-over technique improved leaps and bounds when I acquired a gooseneck kettle. Before then, I had struggled mightily (although attending my friend Luke’s Brewing Masterclass a few months before also helped put me on the right track). This needn’t cost a fortune, by the way.
While I love my electric, temperature-controlled gooseneck kettle, there are cheaper options out there which just heat the water (I bought an electric one for use at my Dad’s for £30 while Amanda has an even simpler one she uses on her stove-top). Finally, right at the other end of the scale, there are simple gooseneck pouring jugs, such as the one I got for my travelling coffee kit, which you can get for around £10.
Before we get to making coffee, I want to describe two basic pour-over methods, which I call weight-in and weight-out. In the weight-in method, you weigh the water you pour over the coffee grounds. For the weight-out method, you weigh the amount of coffee that comes out of the filter. There is quite a difference by the way: as a rule of thumb ground coffee absorbs about 2½ times its own weight in water during the brewing process, so for a classic 300 ml of water to 18 g of coffee ratio, if you pour in 300 ml of water, you’ll typically get just over 250 ml of coffee out.
There’s also a difference in the equipment you need. For the weight-in method, since you’re weighing the amount of water that’s being added, you can put the carafe (or, at a push the mug), and filter on the scales. And if you don’t have any scales, you can use a mug to estimate the amount of water. For the weight-out method, you definitely need a stand to ensure that the filter isn’t resting on the carafe.
With all that in mind, let’s turn to actually making coffee, which you’ll find after the gallery.


...")


.")
 1
1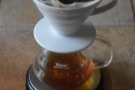 2
2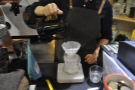 3
3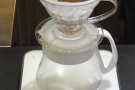 4
4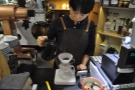 5
5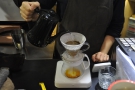 6
6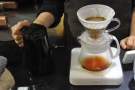 7
7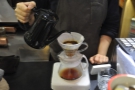 8
8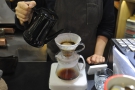 9
9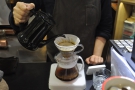 10
10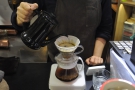 11
11 12
12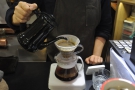 13
13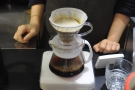 14
14 15
15I use both the weight-in and weight-out methods, although I prefer weight-out, which I use when at home with my stand. When travelling and using my collapsible filter, I use the weight-in method. The technique for both is the same, you just need to vary the amount of water used. Again, I’m going to use the classic 300 ml to 18 g ratio, only here I’m aiming for 300 ml of coffee filtered through in the weight-out method. If you’re using the weight-in method, you will want to add around 345 ml of water.
There are so many pour-over techniques and recipes out there that I’m not going to even attempt to describe them. Instead, I’ll just give you my basic recipe. That said, I love standing at pour-over bars in coffee shops around the world, watching how different baristas make coffee. I encourage you to experiment, watch baristas (on-line these days, rather than in-person!) and develop a method that suits you, adapting it to your choice of filter method.
The first step,as always, is to boil the water. While the kettle is boiling, fit your filter paper into your <insert filter method here> and then rinse it through with some hot water (it doesn’t have to be boiling). This also warms up your <insert filter method here> and, if you’ve remembered to put the carafe underneath, it warms that up too. If you forgot, have a cloth on hand to mop up the mess (trust me, I’ve done this before now!).
Next, weigh out and grind the coffee beans (I use a medium grind; you’ll find some pictures/advice in my guide to grinding coffee at home). Put the ground coffee in the filter and, once the kettle’s boiled, you’re ready to go.
For my immersion methods, I set my temperature-controlled kettle to 92°C, but for pour-over, I go with 94°C. If I don’t have a temperature-controlled kettle, then I just leave the kettle to stand for 30 seconds after boiling (or, if I’m using my gooseneck pouring jug, I put the boiling water straight into the jug, relying on the jug to cool it down).
You can read about my basic recipe after the gallery.


 1
1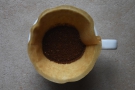 2
2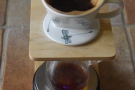 3
3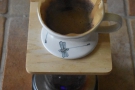 4
4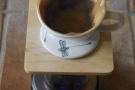 5
5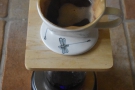 6
6 7
7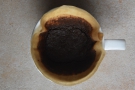 8
8First, pour a small amount of water into the coffee grounds and start your timer (if I don’t have my scales with the in-built timer I use my smart phone). I’m aiming to thoroughly wet the grounds: for the weight-in method, this is about 50 ml, but otherwise I do it by eye. I also give the resulting mixture a good stir, but this is frowned upon in some circles!
This stage is known as letting the coffee bloom. Typically, I allow 30 seconds before starting the main pour, but, unlike immersion methods, where coffee and water remain in contact, here the water starts filtering through straightaway, so I keep an eye on it. If the water is filtering through too quickly (or I didn’t put enough in to begin with!) I begin the main pour before the 30 seconds are up.
The main pour is where you pour the rest of the water into the filter. It’s also where you’ll find the greatest variation. Some people have a single pour, putting all the water in and then leaving it to filter through (I’ve never had success with this!). Some have very precise steps: put x ml in, wait y seconds, then put another set amount in, and so on. Some stir after pours, some don’t. Finally, at the far end of the scale, you have the continuous pour, where the barista pours the water slowly and steadily throughout the whole brewing process (this was illustrated in the previous gallery). If you’re going to try this (and I don’t have the patience for it!), you really need a gooseneck kettle, since controlling the rate of flow is absolutely essential.
For my basic recipe, I do one main pour, looking to fill the filter to about 2cm from the rim. I pour using a circular technique, although this is another source of variation (some recommend pouring into the centre, for example, although no-one I know of pours down the edges of the filter). I then watch while the water filters through.
Rather than using a set duration, I prefer to wait until the water is almost drained through, but not so much that the tops of the grounds are showing. Then I make a final top-up pour. If I’m doing the weight-out method, this will take it back to near the 2cm mark, while if I’m doing the weight-in method, this will bring it up to the total amount of water required. Then I just wait for the water to filter through, although for the weight-out method, I remove the filter when 300 ml has filtered through.
Ideally, this should take about three minutes from the start of the first pour (for the bloom). Any faster than this, and the grind is probably too coarse. Any slower, the grind is too fine, although I don’t get too hung up on the time. Anywhere between 2½ and 3½ minutes and I’m not that worried, particularly if the resulting coffee tastes okay! I also find that my V60 filters more steadily than my ridge-bottomed filter, which filters quickly at first, but then slows down towards the end.
Finally, a good indicator that you’re getting it right is if you have a nice, flat bed of coffee in the bottom of the filter paper, although the best indicator of all (and the only one that matters) is how the coffee tastes at the end of the process!
January 2022: I wrote this piece at a time when I was using paper filters for all my pour-over methods. Since then I’ve bought some reusable cloth filters which have their pros and cons but which, overall, I prefer to compared to paper filters. If you want to know more about them, I’ve given them their own dedicated Making Coffee at Home post.
For more about the theory of pour-over, you can read about the Brewing Masterclass I attended a few years ago.
Luke’s course aside, I learnt much of what I know about making pour-over from sitting at numerous counters, watching baristas, with their many and varied techniques. Sometimes I took photographs, which occasionally made their way into the various Coffee Spot write ups.
So, for a flavour of the various V60 techniques there are, take a look at the following, which are all drawn from the last year of the Coffee Spot (each link takes you straight to the gallery, where you’ll find a sequence of photos towards the end):
- Firelight Coffee Roasters, Atlanta
- Onibus Coffee, Tokyo
- Scandinavian Embassy, Amsterdam
- Little Bean Coffee Museum, Shanghai
You can also find a more detailed write-up about V60 techniques and recipes when Amanda and I went for pour-over in the back room at Roscioli Caffè in Rome.
Just so other brewing methods don’t feel left out, you can also take a look at:
- Origin Coffee, London (Kalita Wave)
- Pair Speciality Coffee & Tea, Mesa (Origami)
- Filter, Cork (Chemex)
- Chatei Hatou, Tokyo (Melitta)
- Gallery Drip Coffee, Bangkok (Melitta & V60)
If you liked this post, please let me know by clicking the “Like” button. If you have a WordPress account and you don’t mind everyone knowing that you liked this post, you can use the “Like this” button right at the bottom instead. [bawlu_buttons]
Don’t forget that you can share this post with your friends using buttons below.