
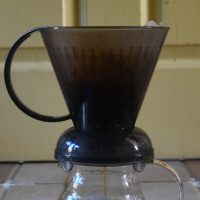
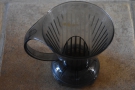
 One of the earliest pieces I wrote for my (then new) Coffee at Home series at the start of the COVID-19 pandemic was about the Clever Dripper. Although there are plenty of excellent filter methods, the Clever Dripper is, in my opinion, the easiest one for somebody taking their first steps into home coffee brewing. Like the humble cafetiere, it doesn’t require any fancy equipment, other than the Clever Dripper itself and some filter papers. It also shares other important characteristics with the cafetiere: it’s simple, reliable and, above all, very forgiving.
I’ve been using my Clever Dripper throughout the last year: it’s my go-to method for filter coffee during the day, mostly for the reasons I’ve stated above. However, I’ve a confession to make: I no longer use the method I published in April last year. As regular readers will know, I’ve become a devotee of James Hoffman’s YouTube channel, and, in early December, James published his Ultimate Clever Dripper Guide. This gives a surprisingly different way of using the Clever Dripper and, having tried it, I was immediately converted. I’ve been using the new method ever since, so thought it was about time I updated my own guide.
You can find out more after the gallery, which is an introduction to the Clever Dripper (from my original guide).


.")


 1
1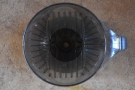 2
2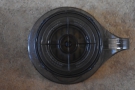 3
3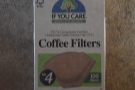 4
4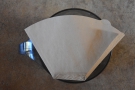 5
5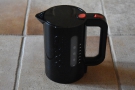 6
6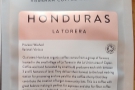 7
7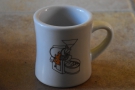 8
8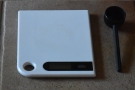 9
9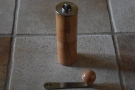 10
10Before I start, please note that this post is just to introduce the new method. To learn more about the Clever Dripper itself, please see my original Clever Dripper Guide (which now includes the new method, along with my original method for comparison). I also want to say that while this post describes the method that I now use, it is entirely based on what I learnt from James Hoffman’s Ultimate Clever Dripper Guide which I urge you to watch. James Hoffmann’s guide is, in turn, based on a Clever Dripper guide from James Bailey of Workshop Coffee, which I also recommend watching.
Just like my original method, all you need for the new method is a mug, a kettle and the Clever Dripper itself (available from multiple independent UK roasters and other suppliers for around £20), along with some filter papers. You’ll also need to measure/weigh the coffee and water. If you don’t have any digital kitchen scales, a coffee scoop and mug/measuring jug will do. Additionally, you’ll need to time your brew: my fancy scales have an in-built timer, but when I’m travelling, I use the timer on my smartphone (or you can count). Finally, you’ll either need a grinder or you can use pre-ground coffee.
The key difference between this and my original method is the order in which you add things. Typically, you add the ground coffee, then you pour the water on top, just like my cafetiere method. However, in the new method, you pour the water in first, then add the ground coffee. You wouldn’t think this would be a big deal, but it solves one of the few problems that the Clever Dripper experiences: clogging during drawdown.
Drawdown occurs when you put the Clever Dripper on your mug or carafe at the end of the immersion period (if you’re new to the Clever Dripper, this will make a lot more sense once you’ve gone through the method itself). Using the traditional method of adding the coffee first, then pouring on the water, I found that drawdown could take two to three minutes and, sometimes, the filter would clog, resulting in an even longer drawdown. I never had a really bad brew as a result, but it was frustrating having to wait a few minutes for the coffee to finally finish dripping through.
In contrast, with the new method of adding the water first, then the coffee, drawdown times are dramatically improved. My brews typically drawdown in under a minute, often going as quickly as 45 seconds. In three months of using the new method, I’ve never had a clogged filter. Quite why this happens, no-one seems sure, but the impact is quite staggering.
With that all out of the way, I’ll describe the method in detail after the gallery.


...")
.")
 and start the timer.")


 1
1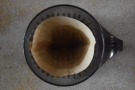 2
2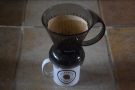 3
3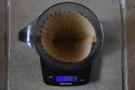 4
4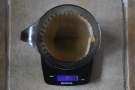 5
5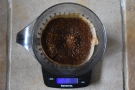 6
6 7
7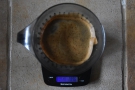 8
8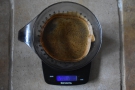 9
9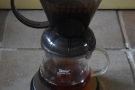 10
10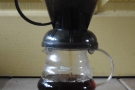 11
11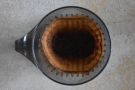 12
12Begin by boiling the water. While the kettle is boiling, fold down the edges of your filter paper and put it in the Clever Dripper. Pour in some hot water (it doesn’t have to be boiling), maybe a quarter to half a mug, and leave it to stand for at least 30 seconds. This rinses the filter paper and warms up the Clever Dripper.
While you’re waiting for that, weigh out and grind the coffee beans. I use a medium grind (the same that I use for a V60: you’ll find some pictures/advice in my guide to grinding coffee at home). Put the Clever Dripper on top of your mug to drain, then, once drained, resist the urge to put the ground coffee into the filter paper (for the first month or so, I’d do this maybe half the time and then I’d have to go back to using the original method!).
Instead, take your freshly boiled kettle and pour the water into the Clever Dripper. Since you aren’t pouring directly onto the ground coffee, using water straight off the boil isn’t an issue (although as James Hoffman discusses in this video, the aversion to using water straight off the boil may well be misplaced).
I use the classic ratio of 18 grams of coffee to 300 ml of water and, in my original method, I used size 4 filter papers. Sadly, I ran out of these a while ago, but I also have size 2 filter papers (from If You Care via Sarah’s Caring Coffee) which I use in my collapsible pour-over filter cone when travelling. However, since I haven’t been doing any travelling for the last year, I still have a large stock of these, so I’ve been using them up.
In theory, the size 2 paper can accommodate 18 grams/300 ml, but I use 275 ml of water to be on the safe side, which means I use 16.5 grams of coffee to maintain the ratio. This fills the Clever Dripper pretty much up to the rim of the filter paper, so if you want to be cautious, I suggest going for 15 grams of coffee and 250 ml of water.
For this method, pour all the water into the filter paper in one go, immediately add the ground coffee, then start your timer/counting. Next, give the resulting mixture a gentle stir, ensuring that the coffee grounds are thoroughly wetted. Then you wait two minutes.
When the two minutes are up, put the Clever Dripper on top of your mug, which opens the valve and allows the brewed coffee to drawdown. Here my method differs slight from the one presented by the two James where, just before the drawdown, they recommend giving the coffee a quick stir/swirl to break the crust. There’s no good reason why I don’t do this. It’s just that I kept forgetting and, since the coffee seemed to come out alright, I’ve stopped doing it.
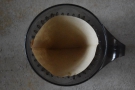
And there you have it. A new, slightly easier, slightly quicker and more consistent way of using your Clever Dripper. As with the original method, a good indicator that you’re getting things right is if you have a nice, flat bed of coffee in the bottom of the filter paper, although the best indicator of all (and the only one that matters) is how the coffee tastes at the end of the process!
If you liked this post, please let me know by clicking the “Like” button. If you have a WordPress account and you don’t mind everyone knowing that you liked this post, you can use the “Like this” button right at the bottom instead. [bawlu_buttons]
Don’t forget that you can share this post with your friends using buttons below.