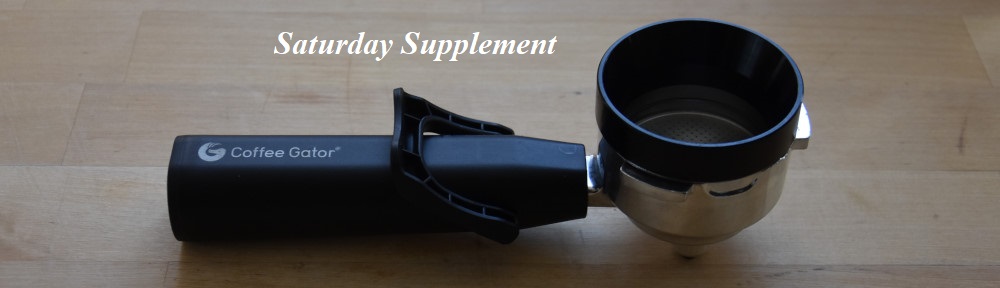
 Last week I wrote about Amanda’s new Coffee Gator espresso machine, which she’d bought for under $150. I was fully expecting to be disappointed, but to my surprise, it made consistently good espresso, far surpassing my expectations. However, after years of being spoilt when it comes to home espresso, including spending the last five years using a Sage Barista Express, I found almost everything about the Coffee Gator, other than the quality of the espresso, to be intensely annoying.
As a machine to prep, use and clean up afterwards, it is incredibly frustrating. This is largely an inevitable consequence of making a machine that can sell for under $150, but as soon as I began using it, I started to think of ways I could improve the experience, which is the subject of this series of posts. I present some potential improvements, including simple accessories and some workarounds to allow you to weigh and time shots in real time (depending on your scales).
This post, Part I, considers two simple and cheap accessories which can improve the workflow during preparation. I also talk about an alternative to the Coffee Gator’s pressurised basket, which I’ll cover in detail in Part III.
You can read about these two accessories, a dosing funnel and a tamper, after the gallery.


 magnets on the bottom to help...")


 1
1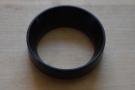 2
2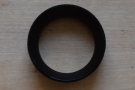 3
3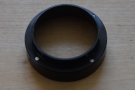 4
4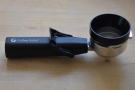 5
5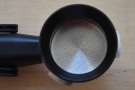 6
6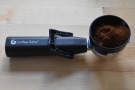 7
7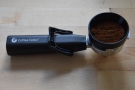 8
8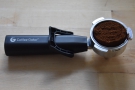 9
9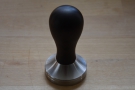 10
10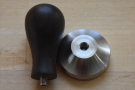 11
11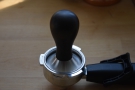 12
12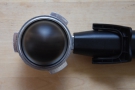 13
13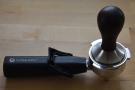 14
14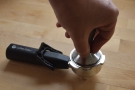 15
15 16
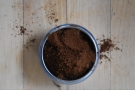
16One of my many complaints about the Coffee Gator is that its 51 mm basket is incredibly difficult to dose using the Baratza Encore (or any similar) grinder which has no portafilter attachment. I’ve always used grinders with a portafilter attachment, like the one in my Sage Barista Express, which grinds straight into the basket. In contrast, with the Encore, you have to pour the ground coffee from the grinder’s bin into the basket, a very tricky process given the basket’s small size. Although I developed several strategies for this, all are fiddly and frustrating. Despite my best efforts, I still spill ground coffee around half the time.
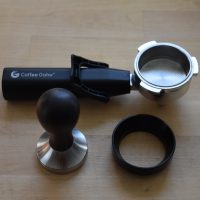
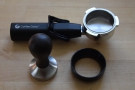
This made buying a dosing funnel for the Coffee Gator an obvious first choice. In essence, a dosing funnel is just what it says, a simple funnel for dosing your espresso basket. You need to ensure that you get the right size for your basket (51 mm in this case), but beyond that there’s plenty of choice. Amanda bought one for just $11.50, which is made of aluminium, with magnets at the bottom to help hold it in place.
It’s nothing fancy, just a 51 mm ring that widens slightly at the top (62 mm in this case), and while it doesn’t sound much, it makes all the difference since it effectively doubles the depth of the portafilter, allowing you to pour in all the coffee grounds in one go without any spilling over the sides. Then give it a quick shake to even things out, (carefully) remove the dosing funnel and tamp the grounds as normal. No fuss, (almost) no mess.
Talking of tamping, that’s the second purchase Amanda made: a new tamper. I didn’t really focus on the plastic tamper that comes with the Coffee Gator in my original write up, but it’s pretty tacky. I don’t like it and Amanda positively hates it, so she got a metal tamper with wooden handle for just $15. We both find that using the proper tamper is a much nicer experience, while Amanda thinks it makes it easier to get an even bed (I’m not so sure). Either way, we agree that it’s $15 well spent.
Whether either of these purchases actually results in better espresso is debatable (if Amanda is correct about the tamper, then it should result in more even extraction), but regardless, it makes using the Coffee Gator much more enjoyable and far less frustrating, so it’s a no-brainer for me.
The other thing that I considered was replacing the Coffee Gator’s pressurised baskets, which you can read about after the gallery.

 baskets. They look normal...")

.")


 1
1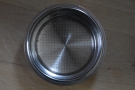 2
2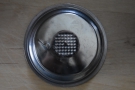 3
3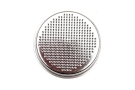 4
4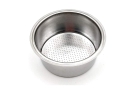 5
5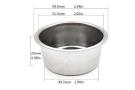 6
6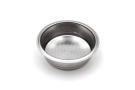 7
7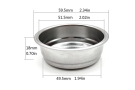 8
8 9
9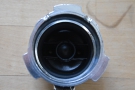 10
10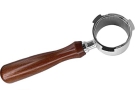 11
11The Coffee Gator comes with pressurised baskets, which have a second wall at the bottom of the basket with a much-reduced set of holes (which is why they’re also called double-wall baskets). This results in a build-up of pressure, in theory producing a more consistent extraction and allowing a coarser grind to be used. Although my Sage Barista Express came with a set of both pressurised and non-pressurised baskets, I only ever used the non-pressurised ones, which have a single wall at the bottom of the basket, allowing the water to flow through (relatively) freely.
Using the Coffee Gator was therefore my first experience of pressurised baskets and I can’t say that I’m a fan. On the plus side, the Coffee Gator reliably produces decent espresso, although I don’t know how much of that is down to the pressurised basket. What I do know is that it artificially enhances the crema on the espresso, which I don’t appreciate.
However, the biggest fault with the Coffee Gator’s pressurised basket is that it retains a lot of liquid once you’ve stopped the shot (not helped by the weird portafilter design). This means that if you don’t immediately remove your cup from under the portafilter, you’ll get quite a bit of additional liquid dripping out (anything up to five grams in my experience, or around 15% of the final shot by weight, assuming you’re going for a 32 gram shot).
It also makes prep and clean-up messy, with liquid trapped in the portafilter, requiring you to disassemble it and dry it out between shots. What’s more, the resulting puck is wet, making it impossible to knock out, all of which led me to decide that, along with buying a dosing funnel, I should replace the basket. Sadly, this wasn’t a straightforward process, otherwise I would have done it by now and be telling you how great (or otherwise) my new basket is.
The good news is that there are plenty of 51 mm baskets available, many of which are under $10, which makes for an affordable upgrade. The bad news is that they are all 25 mm deep, the standard size for a 51 mm portafilter. Unfortunately, the Coffee Gator uses a shallow portafilter (did I mention that it was a weird design?) which requires a correspondingly shallow (< 20 mm) basket. Try as I might, I couldn’t find one.
Until last night, that is, when I stumbled across one while looking for pictures to go in the gallery. Amanda has now ordered a new basket, but it won’t arrive until after I’ve gone home, so I’ll have to wait until my next visit to try it out (although Amanda will use it and give me some initial feedback in the meantime). Until then, the jury is out. Replacing the basket might make prep and clean-up easier, but on the flip side, the Coffee Gator might lose its consistency when it comes to making good espresso.
And, of course, even if the non-pressurised basket does improve things, there’s still the weird design of the portafilter, which, I suspect will continue to trap liquid in the bottom regardless of the type of basket. As a result, I have been considering replacing both the basket and the portafilter, perhaps for a bottomless portafilter, which is taking things to a whole new level… Watch this space!
I did, however, make one other improvement, which isn’t an upgrade per se (assuming you already have scales, that is). Instead, it’s a method to weigh and time shots, which you can read about in Part II of this series.
Don’t forget that you can share this post with your friends using buttons below, while if you have a WordPress account, you can use the “Like this” button to let me know if you liked the post.
Pingback: Coffee Gator Espresso Machine | Brian's Coffee Spot
Pingback: Improving the Coffee Gator Espresso Machine, Part II | Brian's Coffee Spot
I am so grateful for your posts as I have been on the hunt myself to improve this coffee gator espresso machine. Please let me know what you find for the replacement of basket and portafilter. Thanks again for all of the tips and hacks.
I made the mistake of putting my Coffee Gator portafilter in the dishwasher, and was able to find a replacement.
You want a 51mm portafilter, with 3 ears, where the ears are 5.5mm at the thickest. They’ll usually be advertised as fitting the DeLonghi Dedica EC680/685.
Here’s the two I bought, although these links may not work by the time you’re reading this:
Bottomless/naked: https://a.co/d/gCJPunT
Dual/double spout:
https://a.co/d/iAcYtD4
(This particular dual spout portafilter is pretty tall, so you’ll either need tiny cups or to remove the drip tray.)