 I’m the first to admit that I’ve been spoilt in recent years when it comes to home espresso, starting with my Rancilio Silvia espresso machine which I bought in 2013, along with a Rancilio Rocky grinder. Things got even better when, just over five years ago, I received the gift of a Sage Barista Express, complete with built-in grinder, which I’ve been using ever since. On both occasions, they resulted in a large step up in the quality of my home espresso, reinforcing my prejudice against cheap espresso machines, which I’d previously dabbled with.
So, when Amanda told me in March that she’d bought a $150 (£100) espresso machine from Coffee Gator, my heart sank. I felt that cheap espresso machines were a false economy: anything below a certain price-point (roughly the cost of a Sage Barista Express) was unlikely to make an acceptable espresso. Arriving to visit a month later, I fully expected to be disappointed, approaching the new espresso machine with a sense of trepidation. And let me tell you, I hated it. And I still do. Using it to make espresso is not a particularly enjoyable experience. But here’s the thing. It actually makes pretty decent espresso…
You can find out more after the gallery.


.")


: this is the double shot basket, which is the only one I use.")
 basket, with a reduced output area underneath.")


...")


 1
1 2
2 3
3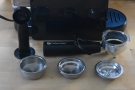 4
4 5
5 6
6 7
7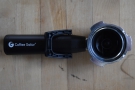 8
8 9
9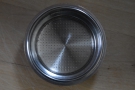 10
10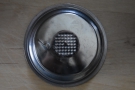 11
11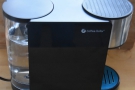 12
12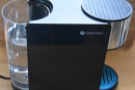 13
13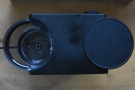 14
14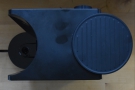 15
15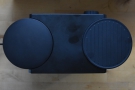 16
16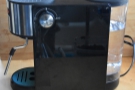 17
17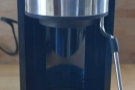 18
18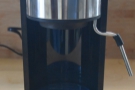 19
19 20
20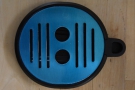 21
21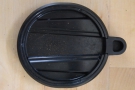 22
22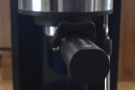 23
23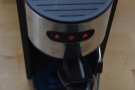 24
24 25
25Before I talk about the Coffee Gator espresso machine, I want to say a few words about grinders. As a rule of thumb, I always recommend spending the same on your grinder as you do on your espresso machine. With hindsight, I think that the main reason I stopped using my Rancilio Silvia was that my Rancilio Rocky grinder had broken and, in a false economy, I’d replaced it with a second-hand grinder that simply couldn’t go fine enough for the Silvia.
Amanda was using her Baratza Encore, which I consider an excellent entry-level grinder for filter coffee. However, I hadn’t really thought of as an espresso grinder, which only exacerbated my sense of trepidation. That said, Baratza markets the Encore as being capable of grinding for espresso and since it’s roughly the same price as the Coffee Gator espresso machine, it fits with my rule of thumb.
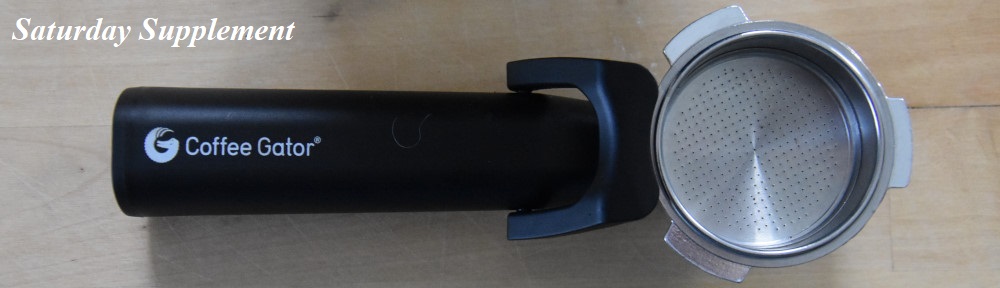
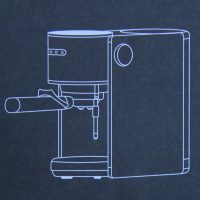
Turning to the espresso machine itself, it’s a fairy compact unit, particularly when compared to my Sage Barista Express (although that does also have a built-in grinder). Quite narrow, it is fairly long and tall (140 x 315 x 262 mm) and is impressively light, even with a full water tank. This is easy to remove, slotting in at the back, while it’s also easy to fill up if you leave it in place. The machine comes with a lightweight portafilter, three baskets (single shot, double shot and pod), a plastic tamper with a scoop at the other end, and a concise, printed instruction manual.
Overall, you get what you pay for when it comes to build quality: in other words, it’s cheap and it feels that way. That said, everything slots together pretty well, so it’s possible that my dislike of it reflects years of using solid machines like the Barista Express and, in particular, the Silvia. The built-in drip tray under the group head is easy to remove but is tiny: you really need to empty it after every shot or two, otherwise you risk a spill.
One thing to note is that both the single and double shot baskets are pressurised (also known as double-wall baskets). I’ve only used non-pressurised baskets before, the difference being that pressurised baskets have a second wall at the bottom of the basket with a much-reduced set of holes. This results in a build-up of pressure, in theory producing a more consistent extraction and allowing a coarser grind to be used.
Another thing worth noting is that the baskets are correspondingly small, at just 51 mm (the Silvia has 58 mm baskets, the same as most commercial machines, while the Barista Express has 54 mm baskets). This is fairly common on lower-end machines, so accessories are easy enough to come by, but it does mean that your maximum dose will be smaller.
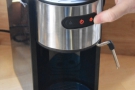
Finally, the controls are pleasingly simple. There are three buttons on the front (a central power button flanked by hot water and steam buttons) while a rotatory switch at the side controls the pump: turning it forwards (towards the front of the machine) starts espresso extraction while turning it away activates the steam wand (which produces either steam or hot water, depending on which button you pressed on the front).
So that’s the machine in a nutshell. But what’s it like to use? You can find out after the gallery.


 1
1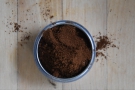 2
2 3
3 4
4 5
5 6
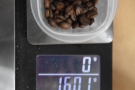
6Amanda had been using the machine for a while before my visit and, by a process of trial and error, hit on a dose, in the double-shot basket, of 16 grams, which I’ve stuck with (I should say at this point that we’ve never used the single-shot and pod baskets). After a little more experimentation, I’ve settled on a grind setting of eight on the Encore (for reference, I’m typically using 14 for a V60, 22 for a Chemex and 28 for a cafetiere).
My standard practice is to flush the machine before pulling a shot. With the Coffee Gator, I switch it on and, while I’m waiting for all three lights to stop flashing and turn a steady red (which means the machine is ready), I attach the portafilter. At first, I found this fiddly, but with practice, it’s become relatively straightforward. Just be aware that you need to hold the machine down as you lock the portafilter into place. I’m used to using heavy machines like the Silvia or Barista Express, but with something as light as the Coffee Gator, it will move if you don’t hold it in place!
Once the lights are on (an impressively quick 30 seconds for the Coffee Gator), I put a cup in place, then rotate the dial at the side to start the pump. I let this run for about 20 seconds, before returning the dial back to upright, which stops the pump. Flushing the machine like this ensures that everything is properly warmed up and also warms the cup. The only issue is that the pressured basket doesn’t drain very quickly: with a normal basket, the water just floods through, but with the Coffee Gator, even after you have turned the pump off and waited a few seconds, there’s still a lot of water in the basket and the portafilter assembly, so I have to manually disassemble it, pour the water away and dry it all! On the plus side, it gives me something to do while I’m grinding the beans.
The next problem is dosing the basket. As before, I’ve been spoiled with the Sage Barista Express and before that the Rocky Grinder, which both grind directly into the basket. That said, Amanda has the same problem as I do, namely that it’s very messy trying to get the ground coffee from the Encore’s bin into the basket. I typically pour about half in, press it down with the tamper, then put the rest in before giving it a proper tamp. Even then, I frequently have grounds scattered around the place!
Finally, we’re ready to pull a shot. Reattach the portafilter, put the cup in place and turn the dial. The Coffee Gator has a two-second pre-infusion stage (which basically wets the ground coffee), then the pump switches off for another two seconds before starting the main extraction. The pump will now keep running until you return the dial to the upright position, at which point I recommend removing the cup since the portafilter still has liquid in it, which will drip out over the next 10 to 20 seconds.
The trick, of course, is knowing when to shut the pump off. With my Barista Express and my Silvia before that, I would both time and weigh my shots, aiming to have double the dose out (so for 16 grams in, I would look to get 32 grams out) in about 25 seconds (timed from starting the pump to stopping it). Unfortunately, since the Coffee Gator’s so narrow, I don’t have any scales which fit under the group head.
Instead, Amanda and I took to timing the shots, but stopping the extraction by eye, using a combination of how full the cup is and how the stream of coffee from the portafilter changes colour. Then, once the shot was over, I’d weigh it (having previously zeroed the scales with an empty cup). With this method, I found that I was running my shots a little long, tending to pull 40-gram extractions in 25 to 30 seconds, although with practice, I started to get closer to my goal of 32 grams in 20 to 25 seconds.
Overall, I found the whole process fiddly and frustrating, but the surprising thing was that the espresso tasted pretty decent. We were using the Bird Dog blend from Speckled Ax, which is very forgiving, but even so, I never pulled a bad shot in three weeks. Even my longer extractions came out tasting pretty good and well-balanced, which, for such a cheap machine, is very impressive.
You can see what the Coffee Gator is like when it comes to steaming milk as well as some of my final thoughts on the machine after the gallery.
 button...")


...")


 1
1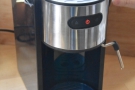 2
2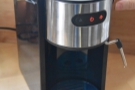 3
3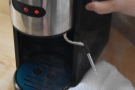 4
4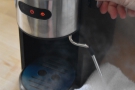 5
5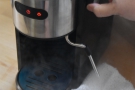 6
6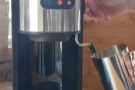 7
7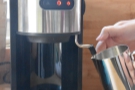 8
8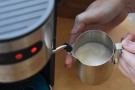 9
9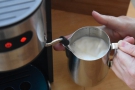 10
10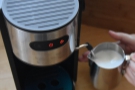 11
11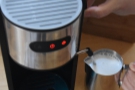 12
12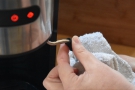 13
13 14
14 15
15 16
16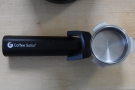 17
17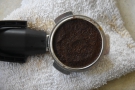 18
18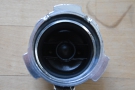 19
19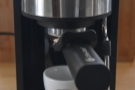 20
20Steaming milk isn’t something that I do very often. Fortunately, Amanda prefers her espresso drinks with milk, so makes good use of the Coffee Gator’s steam wand. Operation is fairly simple, although like most single-boiler machines (which includes my Barista Express and Silvia), you need to prep the machine first. In the case of the Coffee Gator, this means pressing the steam button (the one to the right of the power button) which switches the boiler over to steaming (as an aside, if you press the hot water button, to the left of the power button, the steam wand will produce hot water instead of steam).
In both my Silvia and, in particular, the Barista Express, this switchover takes time while the boiler steps up to the temperature required for steam. In contrast, the Coffee Gator does this almost instantaneously, which is impressive, but does make me wonder what temperature it is running its espresso extractions at. When the hot water light goes out and the steam light is solid again, the boiler is ready to go. Turn the dial away from you and steam as normal. I’ve not used the steam wand myself, but Amanda says that it’s pretty good. Her only criticism is that that rubber sleeve, which you can use to manoeuvre the wand when it’s hot, is tiny, and needs to be a lot bigger.
Watching the wand in action, it’s powerful enough to steam a small jug of milk, more than enough for a flat white, and seems to be faster than my Barista Express (the Coffee Gator takes about 40 seconds to steam 150 ml of milk, enough for a flat white). Amanda is certainly happy with the quality of the foam it produces. Steaming tends to be the last thing we do, so we just switch it off once we’ve purged/cleaned the wand, but if you do want to pull another shot, you need to hit the steam button again to set the boiler back to espresso.
As an aside, if you are pulling multiple shots, you need to wait for the machine to reset between shots. The hot water and steam buttons both flash for about 10 seconds once you’ve turned the pump off, then they return to solid, indicating that the machine is ready for another shot. This is pretty fast, and gives you more than enough time, since it will take you a lot longer than that to clean up and prep for the second shot.
Talking of which, clean-up is the least impressive part of the Coffee Gator. In theory, you should be able to knock out the puck from the basket, give it a quick wipe, dose and then go again. In practice, the experience is nothing like that. First of all, the basket is too loose-fitting, so just comes out of the portafilter if you try to knock it out. However, the Coffee Gator has a fold-over catch on the handle of the portafilter, designed to hold the basket in place when you are knocking it out. Problem solved. Except it isn’t.
First of all, it’s really fiddly to use and secondly, it just doesn’t work. The pressurised basket results in a very wet puck which, even if you glued the basket into the portafilter, wouldn’t knock out. The only way Amanda found to clean out the basket is to physically dig the used grounds out with a spoon or small knife. Of course, this still leaves sticky clumps around the edges, so you end up having to rinse the basket out. Even if you could knock out the basket in one go, the design of the portafilter means that there’s always excess liquid in the gap between the basket and the bottom of the portafilter.
When I’m using the Coffee Gator to make a single shot for myself, this is merely annoying, since I can (and frequently do) leave clean-up until after I’ve enjoyed my espresso. However, when I’m making coffee for myself and Amanda, it’s a complete pain, with clean-up between shots taking far too long, requiring me to remove the basket from the portafilter, rinse everything off, dry it all and reassemble it. Only then can I dose the basket and get ready for another shot.
In conclusion, I stand by my opening remarks. I really don’t like the Coffee Gator. It’s not a bad machine and, in many ways, it’s quite well designed. However, you get what you pay for and, at $150, you will always have compromises in build quality. I find it fiddly and annoying to use, but I cannot deny that, out of the box, it produces consistently good espresso, shot after shot, which I was not expecting.
If I needed to replace my Sage Barista Express, would I buy a Coffee Gator? Absolutely not. But if you’re looking for a good, consistent entry-level machine and you don’t want to break the bank, then the Coffee Gator is an excellent option, although be aware that you’ll need to spend a similar amount (probably more if I’m honest) for a grinder to go with it. Unless, like Amanda, you already have one.
If you do get a Coffee Gator espresso machine, and, if, like me, you find it really frustrating to use, then you might like to consider making some improvements. I’m writing a series of posts about things you can do to improve the Coffee Gator espresso machine, starting with a couple of cheap and simple accessories that will dramatically improve your experience. I’ve also considered how to weigh and time shots (not as straightforward as you might think given the Coffee Gator’s small trip tray).
A final note about buying a Coffee Gator espresso machine. Although clearly branded as Coffee Gator, the espresso machine isn’t on the Coffee Gator website. The only place I can find it online is at Amazon, and then only on the US site, where it’s currently on sale for under $100.
Don’t forget that you can share this post with your friends using buttons below, while if you have a WordPress account, you can use the “Like this” button to let me know if you liked the post.