 Just before Christmas 2016, my home espresso experience was significantly improved by the arrival of a Barista Express espresso machine, a kind (unsolicited) gift from Sage. I already had a Rancilio Silvia, which I’d bought four years earlier, but I’d largely fallen out of love with home espresso due to problems in pulling consistent shots (with hindsight, this was as much to do with a replacement grinder which wasn’t able to grind finely enough).
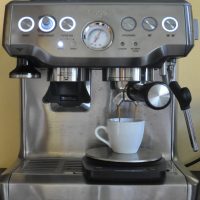
In contrast, the Barista Express has a built-in grinder. It’s also remarkably easy to use. Within a couple of days, I was pulling consistently good shots and, it was fair to say, I was converted. I carried on using the Barista Express for a couple of months, then I wrote up my experiences in what has gone on to become the single most popular post on the Coffee Spot!
For the next few years, I travelled a lot for work, so was only intermittently using the Sage. However, for the last year, I’ve been making an espresso pretty much every day and, as a result, I’ve refined my recipe and technique. In light of this, I decided to was time to revisit the Sage Barista Express…
You can see what I got up to after the gallery.

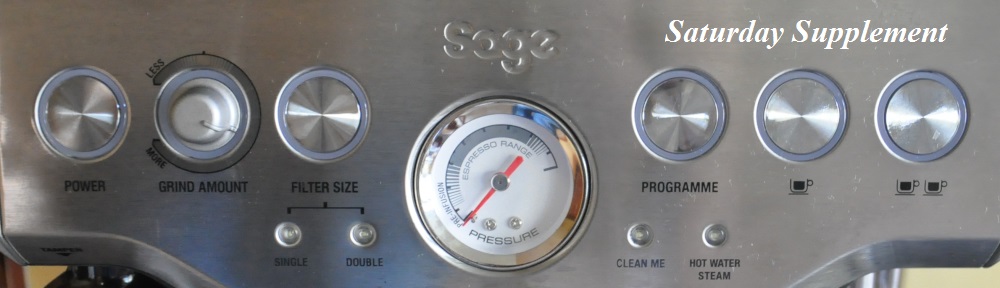
, espresso (right), with a central pressure gauge.")


. However, it's not...")


 but that's okay.")


 1
1 2
2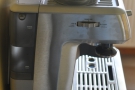 3
3 4
4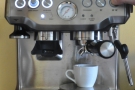 5
5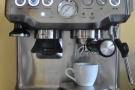 6
6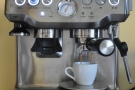 7
7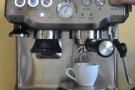 8
8 9
9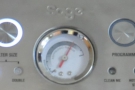 10
10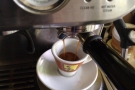 11
11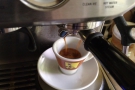 12
12 13
13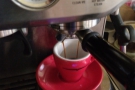 14
14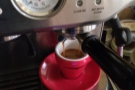 15
15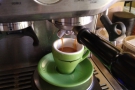 16
16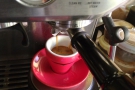 17
17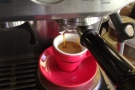 18
18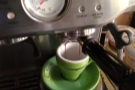 19
19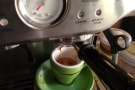 20
20The first thing to say about my Barista Express it’s still going strong after four years, although I’ve probably used it more in the last year than I did in the first three years combined! I clean it regularly, but other than that, I’ve not had to undertake any maintenance or replace any parts.
The Barista Express has always impressed me with its consistency. I could go away for a month for work, and when I got home, I’d switch on the machine, wait for it warm up (under a minute) and pull a reasonably good shot. With the amount of travelling I did, that was really welcome, particularly as I’d rarely be at home for more than a few days at a time. Other than tweaking the grind (or dialling in a new coffee), I didn’t have to change anything.
Since the start of the COVID-19 pandemic, I’ve been at home pretty much all the time, my daily espresso becoming part of my coffee routine. Looking back on my original post (where you can find lots more details about the machine itself) I realise that I’m doing things a little differently now.
Let’s start with the basics. I still manually dose and time my shot. That means that I weigh out my beans for each shot, putting them in the hopper before grinding (as opposed to leaving beans in the hopper and grinding for a specified time). I also don’t use the automatic one/two shot buttons that the Barista Express has. I just press the two-shot button to start the pump running and press it again when I want to stop the shot.
The main thing that I’ve tweaked is the recipe. When I did my original write-up, I was using a dose of 19 g, aiming for 38 g out (that is, I put cup and scales under the portafilter, zero the scales before starting the extraction and stop the shot when the scales show 38 g). My ideal extraction time (the length of time that the pump is running; that is, I start/stop the timer when I press the two-shot button) was in the 25-30 second range.
These days, my dose is 17 g, so I’m aiming for 34 g out (the 2:1 ratio is a generally accepted starting point for espresso extraction). I noted in my original write up that many of my shots ran quicker than 25 seconds and now I aim for extractions in the 20-25 second range, although if a shot is running fast, I’ll tweak things to try to get it closer to 25 seconds. By “tweak things”, I mean adjust the grind size. Having set the dose/extraction time, grind size is the one major variable I control. The finer the grind, the longer the extraction. Conversely, the coarser the grind, the faster the shot.
Although I still weigh/time my shots, the in-built pressure gauge in the Barista Express comes in handy. The manual describes a “solid grey zone”, suggesting that if the needle is anywhere in this zone, the espresso has been extracted at the ideal pressure. In contrast, I find that my best shots are always when the needle is right at the edge of this “ideal” range. Shots where the needle sits in the middle always run too fast, resulting in an under-extracted, weak espresso (take a look at the pictures in the gallery for some examples).
That leads to the obvious question: what’s the best grinder setting? That, I’m afraid, I can’t answer. It varies by bean and the only way you’ll find out is by trial and error (a process known as dialling in). For example, I often use a Brazilian single-original from Lily London, with the grinder typically set to six or seven. In contrast, I had some beans from the Ceylon House of Coffee which were a darker roast. This results in a less dense bean which, in turn, requires a finer grind to obtain the same pressure. When I last used those beans, the grinder was set about as fine it as it goes.
Once you have a particular coffee dialled in, you still need to keep an eye on things. I’ve found that even when I’ve changed nothing, some days the shots will run a little fast/slow and I’ll need to adjust the grind setting by one either way. I’m not 100% sure why this is, but I suspect that temperature and humidity are the main factors.
I hope that this short rundown of my current technique and recipe proves useful. I’ve only scratched the surface of what is a very complex topic. If you’d like to learn more, I suggest you start with James Hoffman’s excellent Understanding Espresso videos which you can find on his YouTube channel.
I’ve also written a companion piece about my Sage Temp Control, a temperature-sensitive milk steaming jug, which has made the world of difference to my ability to consistently steam milk.
If you liked this post, please let me know by clicking the “Like” button. If you have a WordPress account and you don’t mind everyone knowing that you liked this post, you can use the “Like this” button right at the bottom instead. [bawlu_buttons]
Don’t forget that you can share this post with your friends using buttons below.