
 When I started my Coffee at Home series at the beginning of the COVID-19 pandemic in April 2020, the aim was to present some simple ways of improving your home coffee making. My post on the AeroPress was part of my Coffee Preparation Methods series, simple guides on how I use various coffee brewing methods. In it, I wrote about my early struggles with the AeroPress, how I came to fall in love with it, finishing with my preferred way of using the AeroPress, the inverted method.
Fast forward six months, and, as the pandemic dragged on, I took to binge-watching James Hoffmann’s excellent You Tube channel (if you haven’t discovered it yet, I thoroughly recommend it). Since then, I’ve become an avid watcher and, along the way, I’ve learnt an awful lot. Just one example is the Clever Dripper, a method I liked but sometimes struggled with. Then along came James with his Ultimate Clever Dripper Guide and it completely changed the way I brewed with the Clever Dripper.
So, when James released his much anticipated five-part AeroPress Guide, I was intrigued. Would it confirm everything I’d been doing with my AeroPress, or turn everything on its head again?
You can find out after the gallery.
.")


 1
1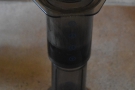 2
2 3
3 4
4 5
5 6
6 7
7 8
8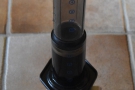 9
9 10
10It turns out that James has (once again) turned everything on its head. You see, when I started with the AeroPress, I’d believed everything I’d read on the packaging (big mistake), which in turn led me to very nearly giving up on my AeroPress. Then I stumbled across TKC Sales, the UK AeroPress distributors, at the Caffé Culture Show in 2013. This quickly changed my mind and, shortly after that, I adopted the inverted method of AeroPress brewing, developing my own recipe which largely played to my prejudices on how to make good coffee, including things like pre-warming the AeroPress, rinsing the filter, allowing the coffee to bloom. Even the inverted method played to those prejudices.
Then I watched James go through them all and, one by one, tear them all down…
Let’s start with the first thing I do before brewing: preheating my AeroPress (each link takes you to the point in James’s video where he discusses the particular issue). For each of my coffee brewing methods, I preheat my brewer, so of course I preheat my AeroPress, the argument being that when you pour hot water to start the brew, you don’t want it going to heat the brewer. Except, as James points out, the AeroPress has excellent thermal properties, so it doesn’t absorb much heat. In fact, in James’s test, not pre-heating only lowers the brew temperature by about ½°C, which is neither here nor there. So, no preheating then…
My next step is to rinse my filter paper. Again, this is just standard procedure, taken from pour-over brewing where I always rinse my filter paper before brewing. But, as James points out, an AeroPress filter is just 0.17 grams of paper. When you’re using 200 – 250 grams of water in a brew, that’s a really low paper-to-liquid ratio, so how much of a difference can it make? As it turns out, none at all. In the blind taste testing that followed, James couldn’t tell the difference between brews made with rinsed and unrinsed papers (as a general point, my palate is notoriously undiscerning, so if someone like James can’t tell the difference, then I stand no chance). So, no rinsing required. What’s next?
A traditional step in any pour-over brewing is to make an initial short pour to allow the coffee to bloom. So, naturally, with my AeroPress recipe, I allow the coffee to bloom. Surely, I must be on safe ground with this one? Turns out, I’m not. Again, in his blind taste test, James couldn’t distinguish between a brew made with a bloom and one where all the water was poured in at once. No bloom then…
Once I’ve poured all the water in, I give the resulting coffee/water mixture a good stir to ensure even distribution of the water/grounds and to promote extraction. In his tests, James finds that stirring makes a huge difference, particularly at lower brewing temperatures. Finally, I’ve got something right! Except, I haven’t, because James is a big fan of swirling over stirring, finding that swirling gives even better results than stirring. Swirling it is then.
So far, I’ve really not done very well, with pretty much everything I do having been shown to be unnecessary (preheat, rinse, bloom) or not as good as it could be (stir versus swirl). All that remains is the brewing method itself, which we’ll discuss after the gallery.


 1
1 2
2 3
3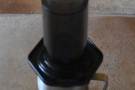 4
4 5
5Before I talk about the inverted method, let’s jump to the end of the process, the point where you press the plunger down. This forces the liquid through the bed of coffee/filter paper, emerging from the bottom of the AeroPress into your cup or jug. Traditionally, I’ve always stopped just at the point where the AeroPress begins to hiss. I can’t really give you a good reason for this; it’s just something that I do.
James describes this as “received wisdom”, pointing out that pressing all the way through the hiss will typically add around six grams of liquid to the finished brew. For one of my brews, where I have in excess of 200 grams of brewed coffee, it’s really a small amount, so how much of a difference can it make? Once again, it turns out to be none at all, with James being unable to distinguish between brews made with and without the hiss.
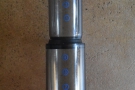
I’ve left this one to last: to brew inverted or not. For those that don’t know, a quick recap. Traditionally, the AeroPress is brewed with the cap and filter at the bottom, so when you pour the water in, some of it immediately starts dripping through. Once you’ve poured all the water in, you can stop this by putting the plunger into the AeroPress, then pulling it back a little to create a partial vacuum, which stops any more liquid seeping out.
The alternative is the inverted method, where you brew the coffee with the AeroPress already assembled and the filter facing upwards, flipping it over just before plunging. This has the obvious advantage that no water leaks out, but, as James points out, having the plunger in the cylinder reduces its capacity and, perhaps more importantly, flipping the AeroPress is risky. I’ve been using the inverted method for eight years and I’ve had an AeroPress come apart mid flip on three occasions, spilling hot water and coffee grounds everywhere, which takes forever to clean up. Once I even managed to scald myself quite badly.
Given these risks, is it worth it? The argument in favour of the inverted method is that it eliminates the small amount of liquid that seeps through. However, as before, this is going to be pretty small compared to the total volume of the brew, so, the argument goes, it can’t make that much difference. And, once again, James does some blind tasting to prove that it doesn’t. If there’s no real benefit, why risk it?
So, in conclusion, along with no preheating, no rinsing and no blooming, and with swirling instead of stirring, I can add no inverted method and no stopping at the hiss. Well, that’s my AeroPress recipe completely dismantled!
That said, I don’t think that I’ve been doing anything wrong in the way I’ve been using the AeroPress up to now. When it comes to preheating, rinsing the filter paper and allowing the coffee to bloom, they’re just unnecessary steps which don’t improve the coffee. Similarly, stopping the press at the hiss doesn’t improve anything, so you might as well press all the way through. The only thing that might improve things is swirling instead of stirring, which I’ve taken to doing, although I can’t say I’ve noticed much of a difference. The big one is the inverted method, which makes great coffee, but adds a small risk, so again, it seems an unnecessary step.
If you’re interested, you can find out what I did as result of all this after the gallery.


 before...")

.")

 1
1 2
2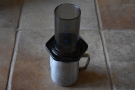 3
3 4
4 5
5 6
6 7
7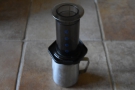 8
8In short, I changed how I use my AeroPress. James published his five-part AeroPress Guide in April, so it’s taken me a long time (six months) to write this, in part because it’s take me this long to get around to changing how I use the AeroPress. Unlike the Clever Dripper, where the new technique solved an existing problem and led me to change how I used it almost immediately, I was very reluctant to change my existing routine for the AeroPress.
I tried, but I’d been making coffee with the AeroPress for eight years and, unless I thought really, really hard about it, I just found myself following my old routine, standing at the counter with an inverted AeroPress, filled with a small amount of water to preheat it, thinking “I thought I wasn’t going to do this”.
I should also point out that in part two of his series, James also talks in much more detail about dose/ratio (how much coffee to water to use), water temperature, brew time and pressure (how hard you press down at the end). All of these are very interesting subjects, and the whole video is worth watching from beginning to end. However, I’ve not really focused on these elements here because they’re largely subjective, unless you go to the extremes, such as really short extraction times or trying to get high pressures (for context, high pressure with an AeroPress is about one bar of pressure, whereas espresso traditionally extracts at nine bars!).
So, where do I go from here? Well, I’ve finally broken the habit of using the inverted AeroPress and have tweaked my recipe accordingly. It’s not identical to James’s Ultimate AeroPress Technique (for example, I use 15g of coffee and 250g of water), but there are similarities, such as dispensing with rinsing the filter paper and preheating the AeroPress, although I still preheat the metal jug I press into.
Other than abandoning the inverted method, the biggest change is in the water temperature I use. When I had a temperature-controlled kettle, I brewed at 92°C, but another video from James Hoffmann has convinced me that (for lighter roasts at least), using water that’s just off the boil is better, so that’s what I do these days (for the record, my electric kettles seem to produce water at around 94°C).
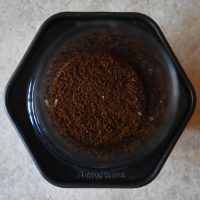
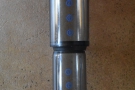
I grind 15g of coffee to a relatively fine consistency (finer than for either cafetiere or pour-over, but nowhere near as fine as for espresso). You’ll find some guidance in my home-grinding guide, but as a rule of thumb, I’d say around the consistency of granulated sugar. Then I put a filter paper in the cap of the AeroPress, attach the cap to the cylinder, put that in the funnel, then put the whole ensemble onto the jug I’m going to be pressing into (having first warmed the jug and discarded the water).
You can, by the way, press straight into the jug, but I prefer to use the funnel as I find it makes less of a mess. You can press into pretty much anything, by the way, although I recommend not using glass. Having a glass carafe shatter during the process is not an experience I would like to repeat!
Boil your kettle, then immediately pour 250g of water into the AeroPress. If you haven’t got scales, this will take the water to around the “4” on the side of the AeroPress. Having finished pouring, put the plunger in place, then withdraw it slightly, which creates a partial vacuum and prevents any more coffee dripping through into the jug.
Now, you wait. In my previous recipe, I had a total brew time of 80 seconds, but in James’s ultimate guide, he’s gone for two minutes, so I’ve adopted that (partly because my own experience suggests that the AeroPress is very tolerant of longer brew times). At the two-minute mark, pick up the whole ensemble (you’ll need both hands) and give it a swirl, wait another 30 seconds, then plunge slowly and steadily until you’ve expelled all the liquid.
And that’s it.
If you liked this post, please let me know by clicking the “Like” button. If you have a WordPress account and you don’t mind everyone knowing that you liked this post, you can use the “Like this” button right at the bottom instead. [bawlu_buttons]
Don’t forget that you can share this post with your friends using buttons below.
So either filter paper has no “taste”, or rinsing it does not remove the taste. I suspect the latter. Did James clarify?
No, he didn’t, but you’ve missed the third option, which I touched on. Since the paper is so small, any taste it does impart will be negligible compared to the volume of the coffee.
Despite its small size/volume, I can taste the paper when it is used to filter coffee. Not a taste I enjoy.
Interesting. In that case, I would recommend rinsing the filter paper (or switching to a metal filter).
But like James, I find that rinsing makes no difference – it is such a persistent taste! So I avoid coffee preparation methods that involve filter paper – espresso via Sage, or cafetière for me.
I see. My apologies! I completely misunderstood your original point. Have you tried using metal filters for the AeroPress (always assumung you have an AeroPress and want to splash out on a metal filter)?
No, I don’t have an Aeropress – I was put off by the potential paper taste and the cost and dodgy reviews concerning metal filters. And then there was the hype ….